In this travel guide to backpacking the Philippines, you’ll find everything you need to know before you go, featuring the best places to visit in the Philippines, along with the essential information you’ll need to make backpacking the Philippines stress-free and fun-filled.
Backpacking the Philippines is one of the most amazing experiences of my life so far, and it is one that I would (and do!) recommend that you do too!
The Philippines has something to please everybody. Whether you’re a beach lover or are an avid diver, an adrenaline junkie, a keen hiker, or a wildlife lover – backpacking the Philippines is guaranteed to blow your mind.
This guide is for:
- Those backpacking the Philippines for an extended period of time (3+ months) AND
- People backpacking the Philippines for two to three weeks and looking to make the most out of their precious annual leave!
So, whether you are a seasoned vagabond who has travelled the globe or looking for an exotic getaway for your summer holiday, this blog is for you.
Top things to do when backpacking the Philippines
If you love nothing more than sipping an ice-cold beer with white sand between your toes watching the sun set over crystal clear waters, connecting with nature and trekking through the jungle, or wild swimming in turquoise rivers, getting acquainted with creatures great and small, there are so many great things to satisfy your travel needs when backpacking the Philippines.
Visit the amazing beaches in the Philippines
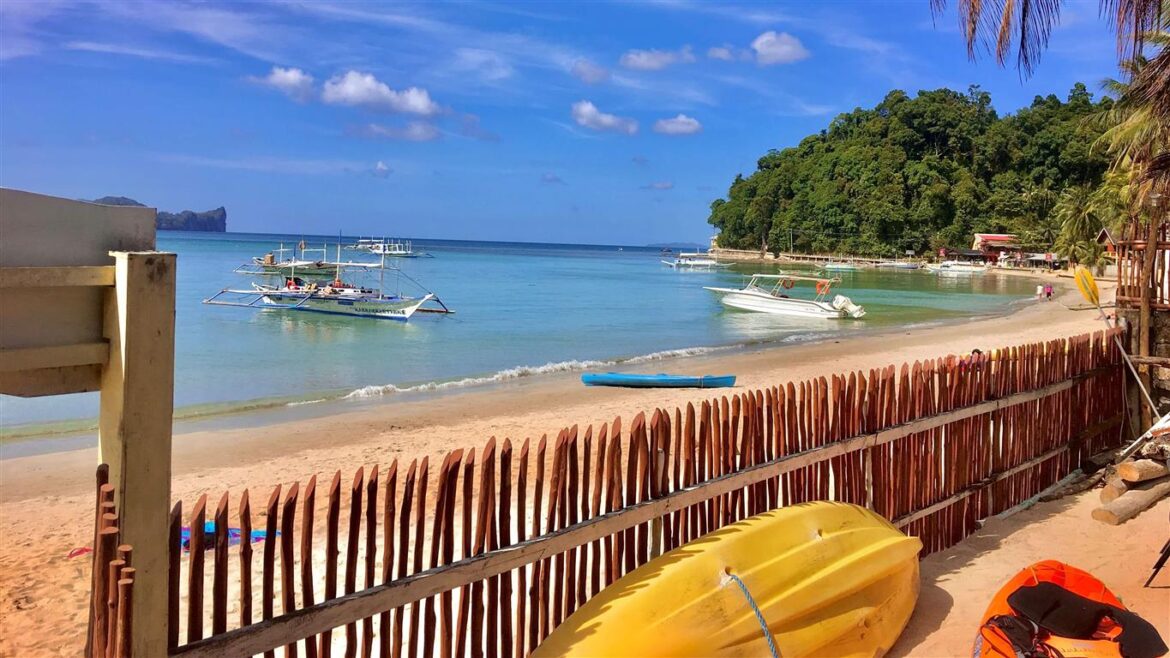
Sabang Beach, Palawan
Not often discussed when considering the best beaches in the Philippines, Sabang beach is seriously underrated. Based in a quiet and more chilled out town than El Nido (one of the most popular tourist spots in the Philippines), the sand at Sabang Beach is golden, the water warm and blue. A great area to surf, as the waves can be pretty epic on a windy day, but when it’s calm, it’s perfect for a refreshing dip.
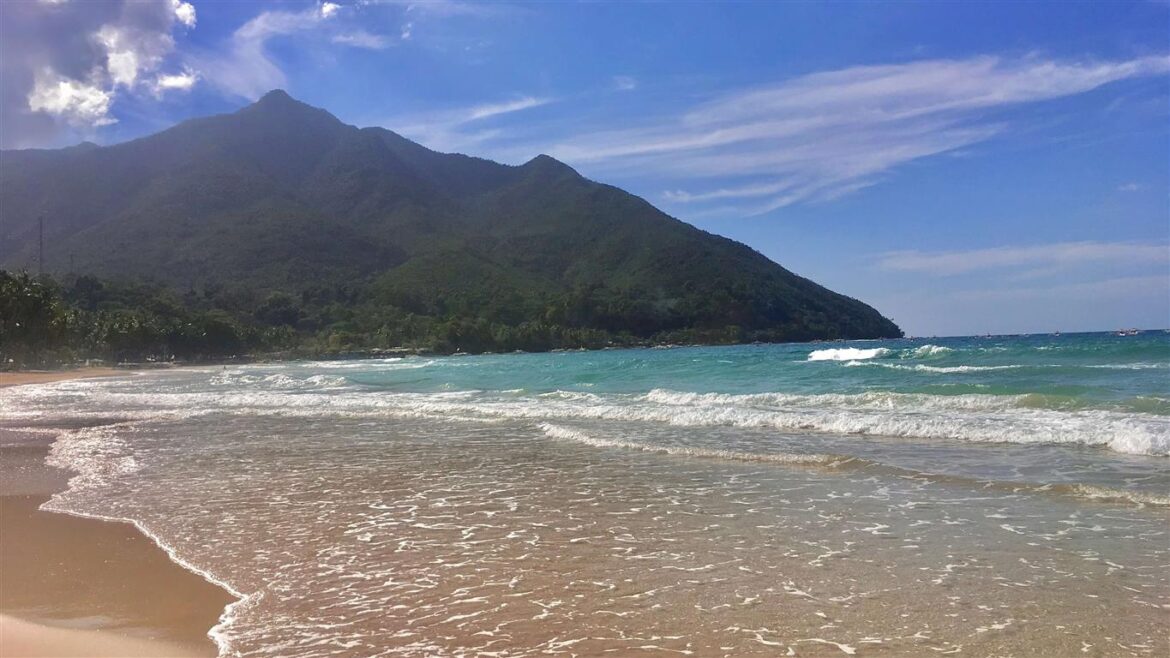
Sabang beach is located where the boats leave to and from the underground river tour so it’s a great place to relax and people watch. You’re likely to have the whole beach to yourself too – winning!
Nacpan Beach, El Nido
Nacpan beach can rival the Boracay beaches – even White Beach! Whilst the sand at Nacpan isn’t as pearly white as White Beach in Boracay, it’s a picture postcard beach. Nacpan is lined with palm trees and thatched huts, with gentle crashing waves. Nacpan beach runs for 4 km and is one of the most beautiful beaches in the Philippines along with its twin beach, Caitlang Beach which is right next door!
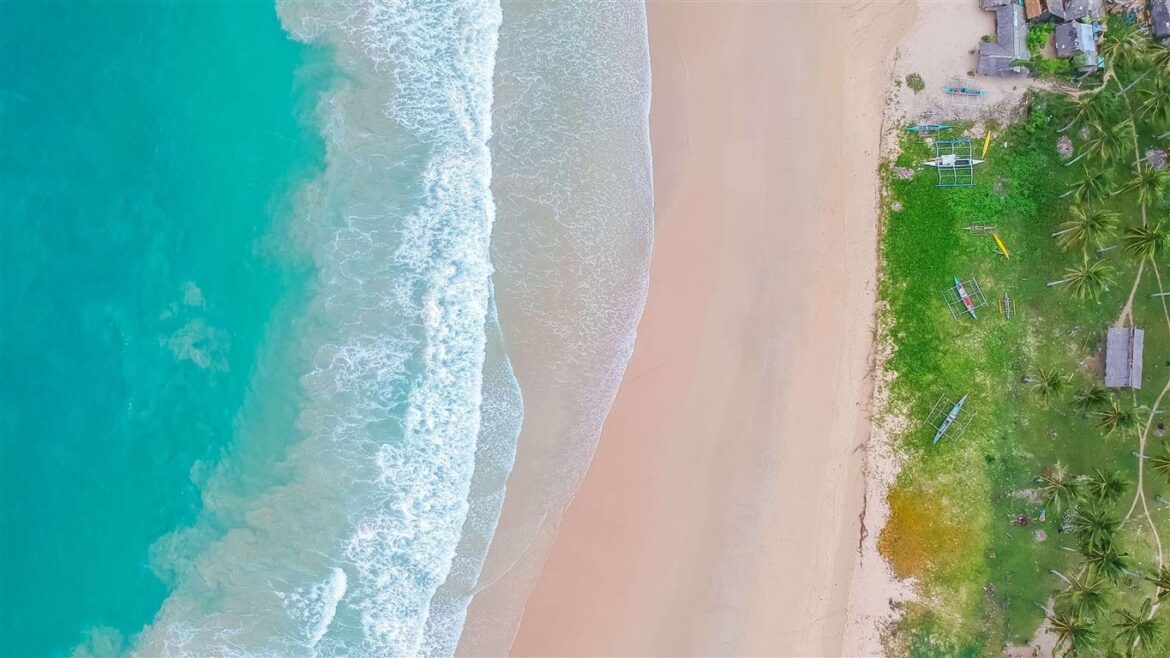
Spend the whole day there, explore the restaurants and cafes, swim in the aqua waters, grab a beer and watch the sunset from the sand – perfection.
If you’re heading to El Nido, or you want to know more about this amazing beach-side town, then take a look at my mini-guide; Things to do in El Nido.
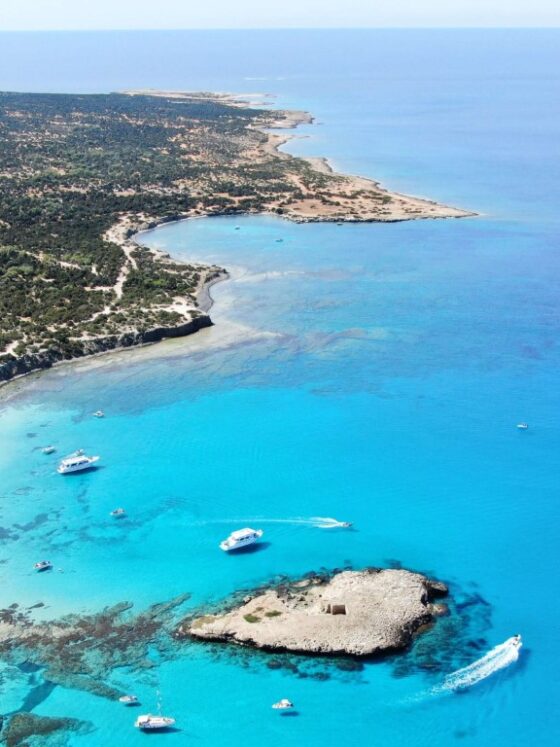
Island Beaches, El Nido
El Nido is one of the most popular tourist spots in the Philippines. The various island-hopping tours that are offered in the town of El Nido attract thousands of tourists, all eager to see some of the most beautiful places in the Philippines; namely the islands that surround El Nido.
No matter which island-hopping tour you choose, A, B, C or D, you’ll see some amazing white sand beaches, some small, some large, some completely unoccupied; gleaming white gems in the middle of the ocean.
A favourite is Seven Commandos beach, where you can camp overnight under the coconut trees and stars. Look out for the plankton glowing in the sea at night.
Island hopping was definitely one of my highlights whilst backpacking the Philippines and so if you want more details, check out my guide to Island Hopping in El Nido.
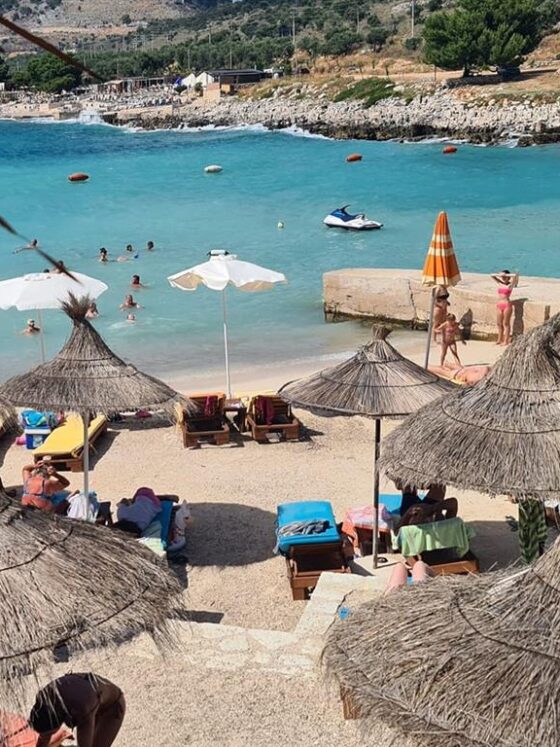
White Beach, Boracay
It’s hands down one of the best beaches in the Philippines and as such is the attraction that draws in the islands many visitors.
Despite seeing the photos, you really must see it to believe it. It’s unsurprising that most people see very little else of Boracay, unable to draw themselves away from paradise.
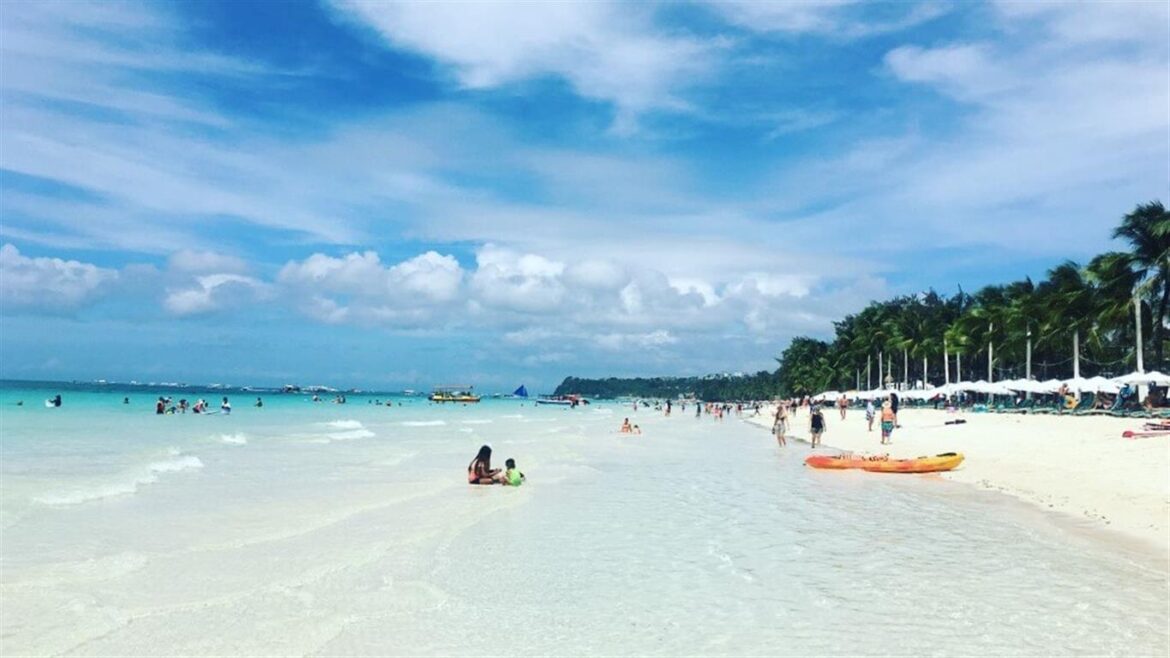
The most popular of the Boracay beaches, it’s 4 kilometres of powdery white sand and glittering azure waters that hurts your eyes it’s so bright – get those sunglasses on.
For more Boracay-related travel inspiration, check out my blog on the Beaches of Boracay.
Paliton Beach, Siquijor
Paliton beach is one of the most beautiful of all the Siquijor beaches. The beach is located on the west side of the island, where you can see the most beautiful sunsets either from the white sand or the couple of beachside bars and cafes.
Paliton beach is the perfect place to relax in a hammock, swim in the warm sea, read a book, play beach games, and repeat.
If you’re only going to visit one of the Siquijor beaches then make sure you head to Paliton beach – it won’t disappoint.
Alternatively, check out my blog on the best Travel Spots in Siquijor for an in-depth look at this amazing little island.
Make some animal friends
Swim with Whale Sharks, Luzon
One of the most popular things to do when backpacking the Philippines, is to swim with Whale sharks. Whale sharks can be found all over the Philippines with the best place, and highest chance of there being an encounter, being at Donsol (Luzon).

Oslob, in Cebu is also a place to 100% guarantee a sighting which in turn has made it into one of the most crowded tourist spots in the Philippines.
The Oslob whale sharks experience features in our “avoid” lists as the 100% guarantee of a sighting comes a whole load of major ethical concerns over the methods of encouraging them to the site. These include hand feeding the Oslob whale sharks, which has negative effects on their wellbeing and natural behaviour.
So, despite being one of the most popular tourist spots in the Philippines, my suggestion would be to give the Oslob whale sharks a miss. Go to Donsol instead.
Meet the Philippine Baby Yodas, Bohol
When ET met Yoda, a tarsier was born! One of the smallest primates in the world, with eyes bigger than its brain but somehow so cute, it’s a must-see when backpacking the Philippines.
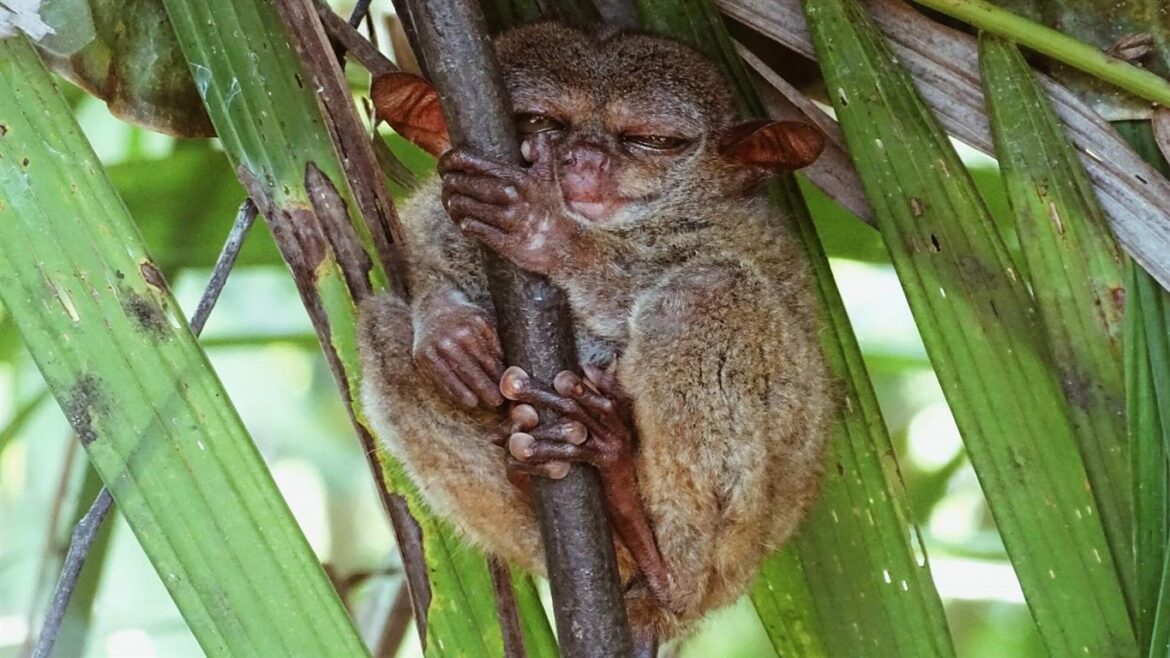
The Tarsier Sanctuary in Corella, Bohol is the place to go. It’s a not-for-profit organisation that is committed to conservation of the tarsier population.
This should not be confused with the Tarsier Sanctuary in Loboc, Bohol – which features in our “avoid” list when backpacking the Philippines.
For more information on these amazing creatures and Bohol in general, check out my other blogs:
[INSERT PHILIPPINE POSTS]
Get the adrenaline pumping
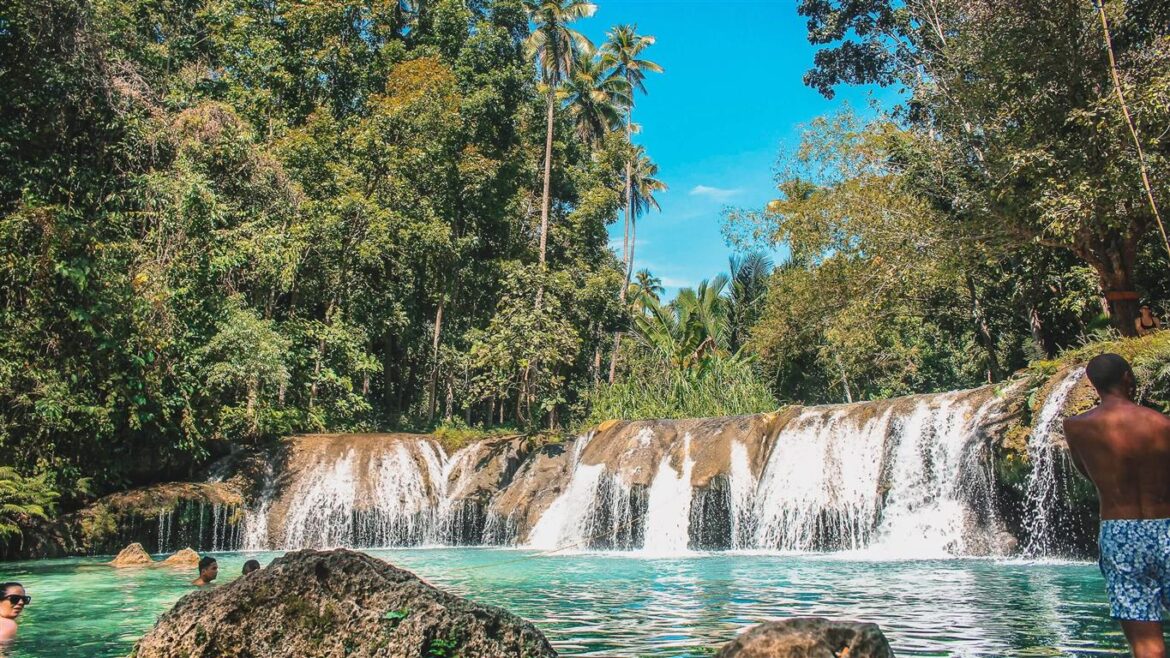
Canyoneering at Kawasan Falls, Cebu
Kawasan Falls is one of the most Instagram-able tourist spots in the Philippines thanks to the variety of waterfalls and turquoise pools they fall into.

Trek through the Filipino jungle, jumping off cliffs (of up to 30 feet high!) to reach the lower falls and swim in fresh, cooling water as you make your way to the main pool.
Kawasan falls is both a terrifying, exciting and relaxing experience, which doesn’t come around often!
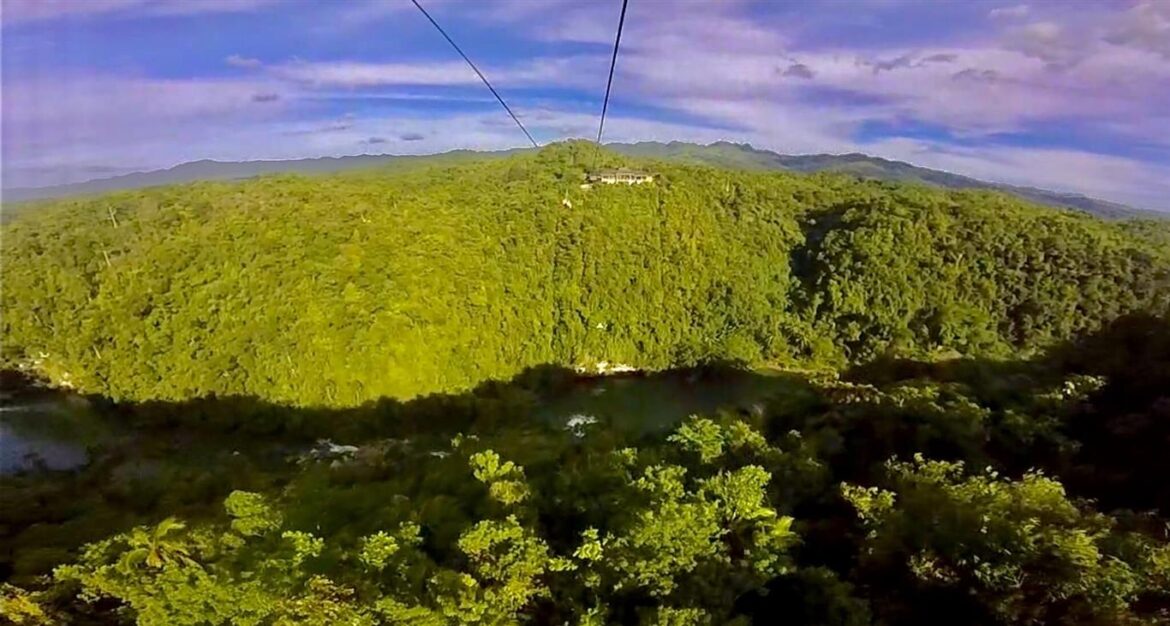
Go ziplining through the forest in Bohol
At 520 metres long and 120 meters high, there is no better way to conquer that fear of heights than by flying like Superman through the forest by zipline.
One of our highlights of Bohol, due to the most spectacular view of the Loboc river and Busay Falls below.
As someone who is a little uneasy with heights, I can assure you that the adrenaline rush and beauty of the surroundings completely melt that fear away.
We took in the zipline during our Scooter Itinerary in Bohol.
For more Bohol inspiration, check out my blog on Things to do in Bohol including a visit to the Tarsiers in Bohol.
Go Island Hopping in El Nido, Palawan
El Nido is world renowned for island hopping and the white sand beaches, snorkelling, kayaking and swimming that comes with it. Island hopping in El Nido is something we would love to do again one day.
The nature witnessed over our two-day island-hopping tour in El Nido was unforgettable, and despite travelling to other countries, unparalleled in my opinion!
If you’re backpacking the Philippines for that beach life, then island hopping in El Nido must be on your list. The tours offer a mixture of some of the best beaches in the Philippines, turquoise lagoons, limestone cliffs and caves, and some of the best snorkelling we’ve ever done.
Island hopping was definitely one of my highlights whilst backpacking the Philippines and so if you want more details, check out my guide to Island Hopping in El Nido.
Visit some of the best tourist spots in the Philippines
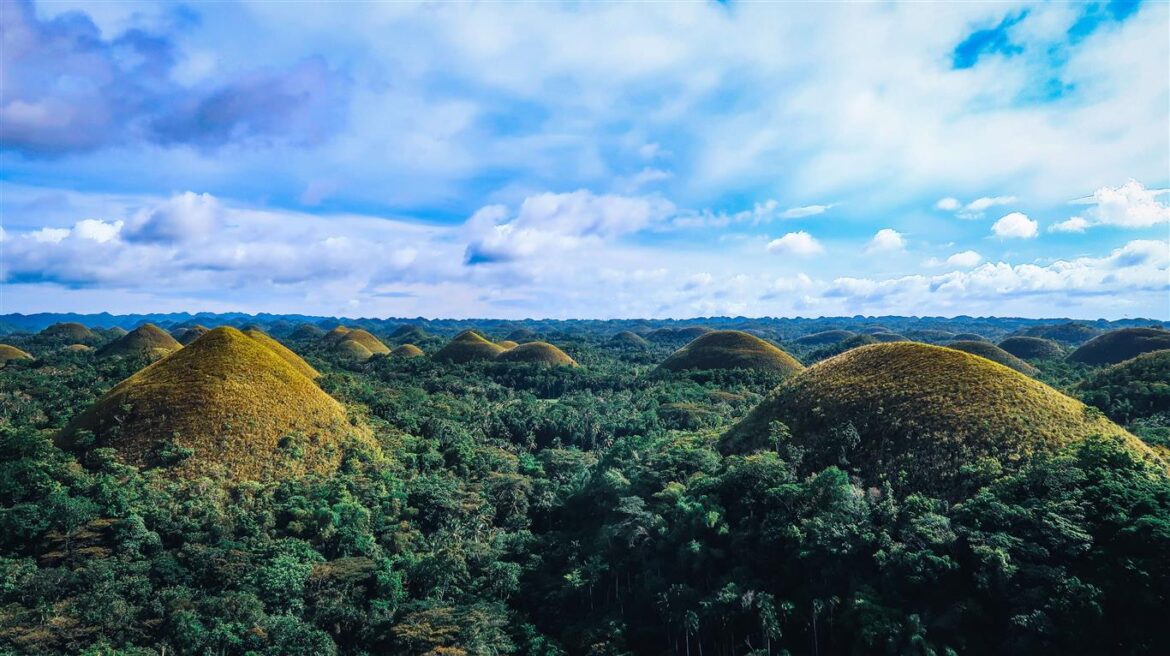
Chocolate hills, Bohol
This is the tourist spot in the Philippines that puts Bohol on the map. There is no surprise then, that this is one of the busiest tourist spots in the Philippines but it’s must-see.
Thousands of cone shaped hills spread over a 50 square kilometre area, they get their name from their unique formations and vegetation which in the dry season turns a rich chocolate brown, looking like a bunch of walnut whips sprouting straight out of the ground.
Check out our 3 day Scooter Itinerary in Bohol which takes in the Chocolate Hills or for more information on Bohol, I have prepared a Mini Guide of Things to do in Bohol.
Puerto Princesa underground river, Palawan
Again, one of the most popular tourist spots in the Philippines, but it’s a goodie! The world’s longest navigable underground river running for 8.2km, and both a UNESCO World Heritage Site and one of the New 7 Wonders of the World.
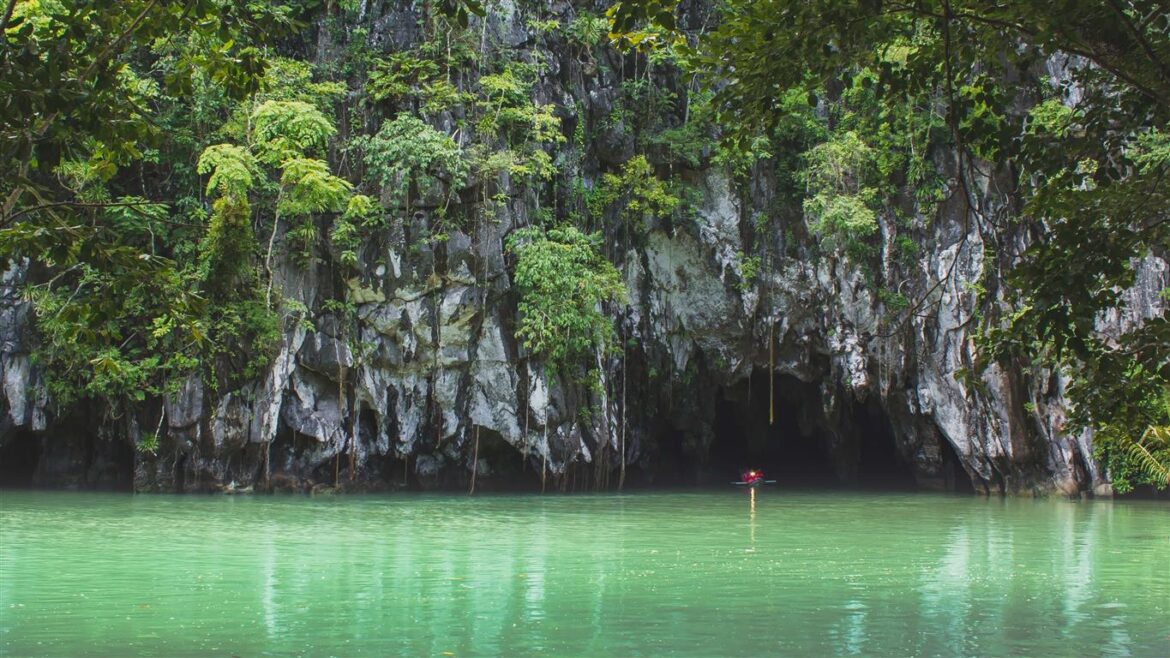
Slowly float through the underground river in pitch darkness, with your guide pointing out the intricate cave system, impressive formations of stalactites and stalagmites and the thousands and thousands of bats that live here with his torch. Unforgettable and a highlight of backpacking the Philippines.
Places to visit when backpacking the Philippines
The Philippines is a country made up of 7,620 islands of which only(!) 2,000 are inhabited meaning some 5,620 islands are uninhabited…crazy! Anyway, it’s huge and there is a lot to see and do when backpacking the Philippines.
The Philippines is divided into three main areas:
- Luzon to the North (including the islands of Luzon (from which the region gets its name), Palawan and Mindoro);
- The Visayas (formed of the main islands Bohol, Cebu, Leyte, Masbate, Negros, Panay, and Samar); and
- Mindanao to the South.
The Luzon Islands
Luzon Island
Perfect for: the adventurous traveller; off the beaten track; history buffs
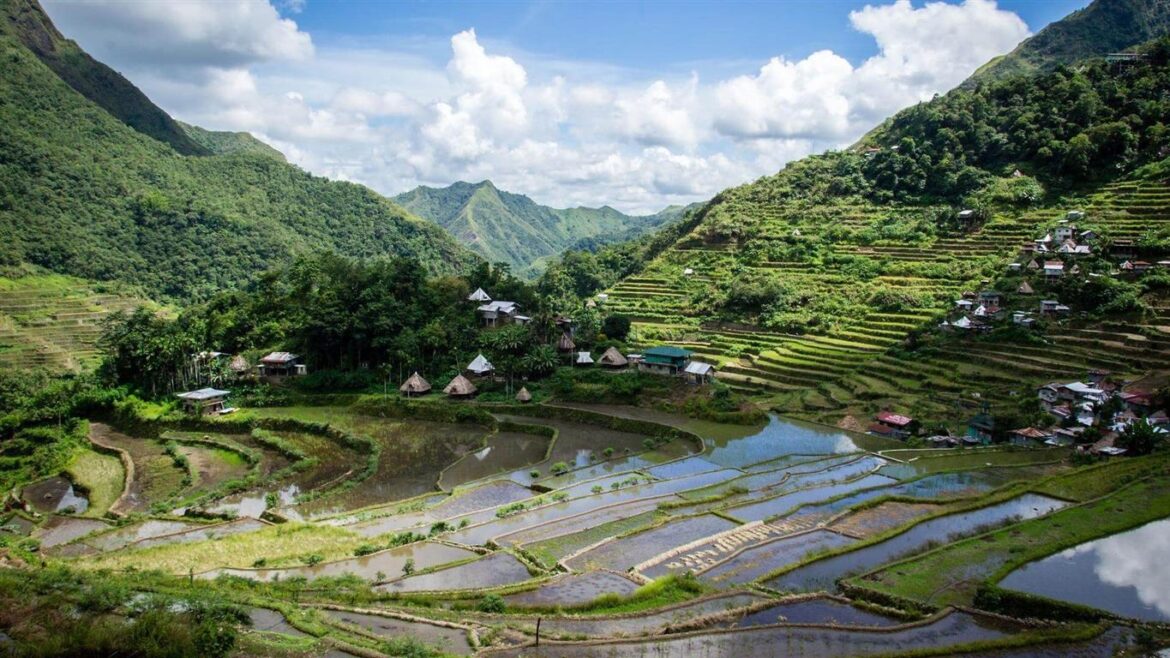
Tourist Spots in Luzon: Batad Rice Terraces, Corregidor tour; Mayon Volcano National Park
Home to the Capital, Manila, and the major airport Ninoy Aquino International. Luzon’s population is likely to surpass that of the UK in just a few years – it’s massive. Most people head straight out to the islands, but Luzon is worth sticking around for and exploring.
Luzon offers so much natural beauty, unknown beaches, unexplored jungles and a more rugged, tourist-free experience whilst also providing more cultural experiences.
Here are some of the best tourist spots in Luzon for you to explore:
- Visiting the Batad Rice Terraces for a peek into the life of a rice farmer and the families that live there
- Take in some history on the Corregidor tour where you will learn more about Corregidor Island, once a notorious battleground during WWII, and about how the conflict affected the Philippines
- For hiking in the Philippines, visit Mayon Volcano National Park for a bit of adventure, for beautiful trails of varying difficulty where you’ll see some of the natural beauty the Philippines has to offer
- Step back in time for a taste of Philippine history in the Spanish Colonial town of Vigan.
Palawan
Perfect for: Nature lovers; beach bums; island-hopping enthusiasts; divers
Tourist Spots in Palawan: Island hopping in El Nido, the underground river tour at Puerto Princesa/Sabang; diving in Coron
Palawan has so much natural beauty and is really an island where you can have a taste of everything the Philippines has to offer. Lush forest, an abundance of wildlife, island hopping, white powdery beaches, crystal-clear waters, fishing villages and more vibrant, lively towns. You could spend a few months just getting to know Palawan.
Palawan is roughly split into 4 provinces, El Nido, Coron, San Vincente and Puerto Princesa. All four are incredible and if you have time, you should visit them all.
Short on time? Island hopping in El Nido and the underground river tour in Puerto Princesa shouldn’t be missed. If diving in the Philippines is the reason for your visit – head to Coron for spectacular underwater sights.
Puerto Princesa
Perfect for: Foodies; city lovers
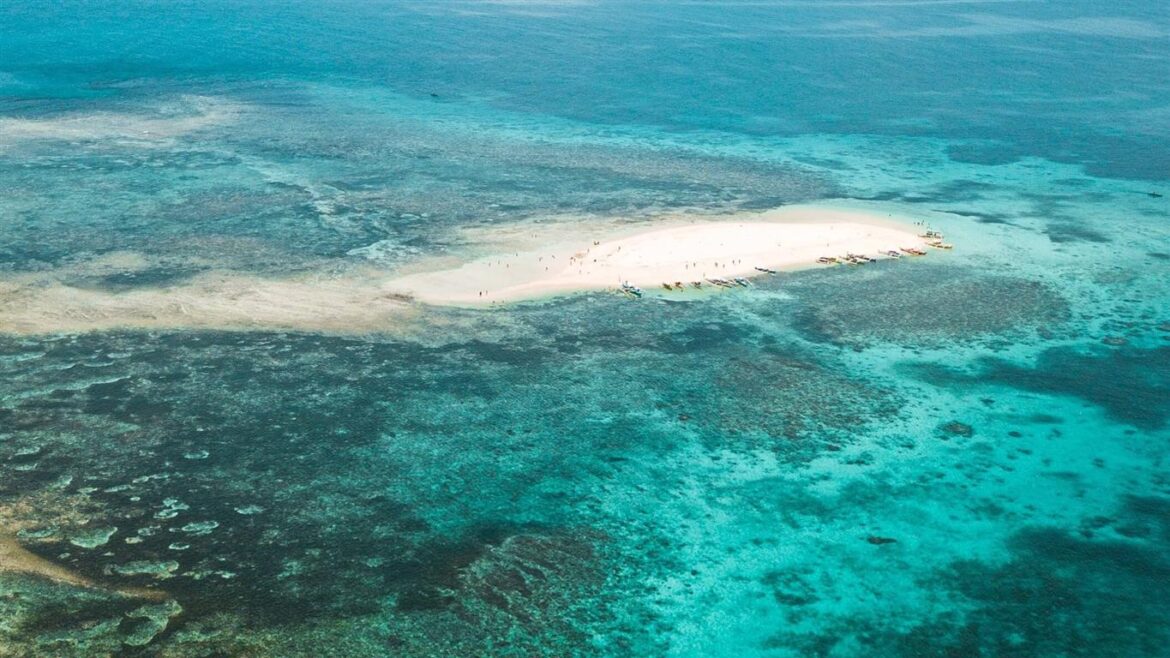
Tourist Spots in Puerto Princesa: Underground river tour; Honda Bay Island Hopping
Puerto Princesa is the capitol of Palawan and the largest region of the island. As such, it’s usually the starting place for most people backpacking the Philippines, after they have left Manila, starting at the south of Palawan to head North to El Nido and Coron.
The main airport in Palawan is based in Puerto Princesa and this is where most tourists and travellers start their Palawan exploration and island-hopping trip.
Sabang is a great place to stay outside of the city, and it’s where underground river tour sets off. Less people stay here but for a back-to-basics experience, this is the place to stay. Honda Bay offers an alternative island hopping experience to that in El Nido with three gorgeous sand bars on the itinerary, Luli, Cowrie and Starfish Island.
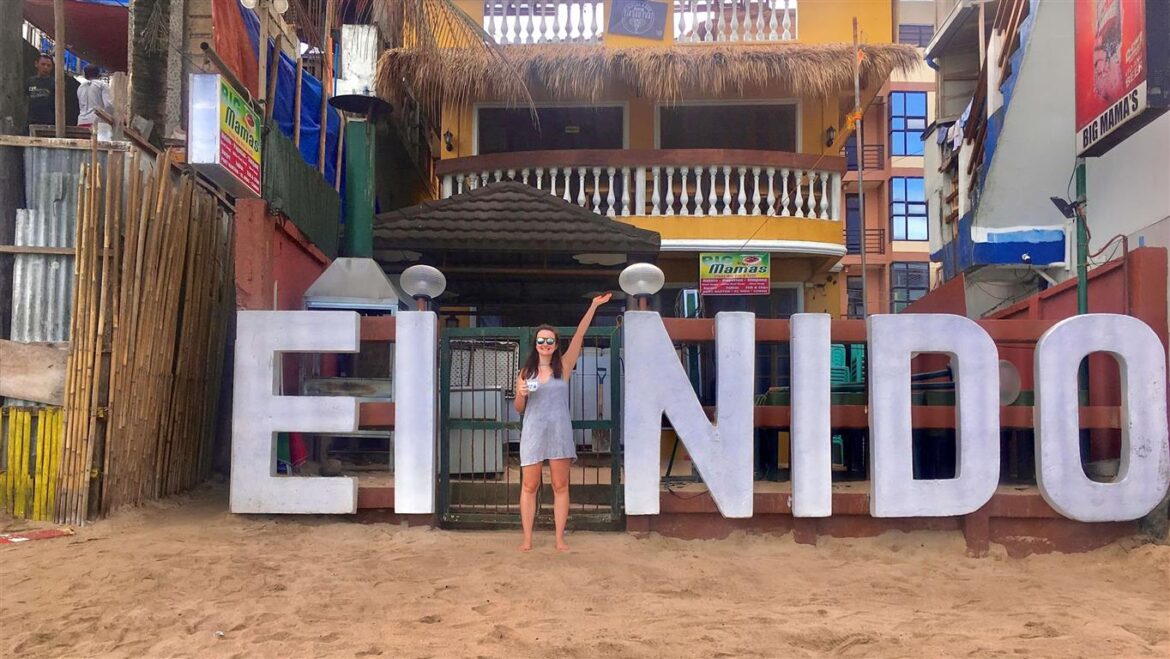
El Nido
Perfect for: Beach bums; Divers; Island-hoppers
Tourist Spots in El Nido: Island Hopping Tour; Big Lagoon; Nacpan Beach
El Nido is the crown jewel, and taking one of their tours (A, B, C or D) is an absolute must. Seriously, you can’t come to the Philippines without visiting El Nido – it has to be seen to be believed.
We would recommend doing the overnight camping tour, where you will be treated to the wonders of big lagoon, hidden beach and helicopter island. To finish the day, and after a few too many local rums, you fall asleep under the palm trees and pray to God you don’t get killed by a coconut on Seven Commandos Beach – perfect huh?!
Note: We have heard that the overnight tours have now stopped due to an “incident” during one tour. If you have any information then do get in touch and let us know!
El Nido and the island hopping tour was one of our highlights whilst backpacking the Philippines. If you want to know more about El Nido, check out my Mini guide; Things to do in El Nido and my guide specifically on Island Hopping in El Nido.
San Vincente
Perfect for: Beach bums
Tourist Spots in San Vicente: Port Barton
Port Barton in San Vincente also offers island hopping and super chilled beach vibes.
Port Barton is the perfect place to stop before arriving at the slightly more chaotic El Nido. Long Beach in San Vincente is a must see for beach bums.
Coron
Perfect for: Snorkellers and Divers
Tourist Spots in Coron: Wreck Diving; Coron Beach
Coron in Palawan is a snorkelling and diving haven, with 13 shipwreck sites, the majority of which are Japanese ships sunk during WWII.
Forbes has declared these battleships as one of the world’s best dive sites. If diving in Coron is not for you, why not try snorkelling? Some of the sites are shallow and can be enjoyed without the need to dive.
The Visayas
Bohol
Perfect for: Beach bums and divers to the South, adventurers to the North
Tourist Spots in Bohol: Panglao Beach; Chocolate Hills; Tarsier Sanctuary; Nuts Huts Hostel
The island of Bohol is the largest of around 76 islands forming the Province of Bohol and is the 10th largest island in the Philippines. I really loved Bohol as it’s a place that has it all.
From its famous Chocolate Hills, rice paddies, waterfalls and teeny tiny Tarsiers for nature lovers, ziplines and jungle treks for adventurers, beautiful Bohol beaches and resorts for those looking to relax and a consistent top-10 worldwide diving destination in Panglao Island to the south of its Capital, there is something here for everyone.
Not only that but it’s home to one of the best hostels in the whole of the Philippines in Nuts Huts. Nestled in a valley with a river below and tree-covered hills above, this back to nature hostel is reason enough to include Bohol in your itinerary.

Take a look at our other blogs on Bohol for some more travel inspration to this amazing island:
[INSERT BOHOL BLOG CAROUSEL]
Cebu
Perfect for: City lovers in Cebu City, beach bums and adventurers elsewhere
Tourist Spots in Cebu: Moalboal Beach; Moalboal sardine run; Kawasan Falls
The Province of Cebu consists of Cebu Island and 167 smaller islands. Cebu City, on Cebu Island is the oldest city in the Philippines and was previously the capital.
It’s also the second largest major airport (for international and domestic flights) and home to Cebu port for access to Bohol and so its likely you will be a Cebu City at some point during your trip!
Moalboal, on Cebu island, is a fantastic, laid-back beach front town on the west coast of the island. From the beaches here you can swim out to see the Moalboal sardine run and sea turtles, you can eat and drink at the numerous bars overlooking the water and it is the perfect base for one of our favourite activities during our time backpacking the Philippines; the incredible Kawasan Falls.
Take the fantastic day-long canyoneering experience at Kawasan Falls starting in the hills and ending with a 10-12m jump off the top of Kawasan Falls (there are steps if you prefer the less direct route!).
Cebu is also home to the Oslob Whale Sharks, on the south coast and it is possible to snorkel with these magnificent creatures from Moalboal. However, as I mention above, I would advise swimming with the Sharks at Donsol and NOT Cebu for ethical reasons.
Siquijor
Perfect for: Beach Bums; waterfalls and rope swing lovers
Siquijor Tourist Spots: Siquijor Falls including Cambugahay Falls; Paliton Beach
The little island of Siquijor is well worth a trip if you can find space in your itinerary. It is easily accessible from both Bohol and Cebu and being only 327 square kilometres it is very easy to travel around.
Its coast is home to some stunning beaches for relaxing, and corals if you want some more superb diving in the Philippines. Inland, it has some amazing waterfalls including Siquijor Falls, and rope swings to explore.
Coupled with a number of good, cheap, beachside hostels and easy scooter rentals, Siquijor is the perfect place to explore at your own pace for a few days.
Many Filipinos, and some tourists, avoid Siquijor on account of its long-standing reputation of witch-doctors and sorcery, some of which is practiced to this day. But if you can look past these traditions, you will find an idyllic island ready for exploration.
For more inspiration, check out our blog of Tourist Spots in Siquijor.
Leyte
Perfect for: History buffs, beach bums; nature lovers
Tourist Spots in Leyte: Kalanggaman Island; Macarthur Park Leyte; Lake Danao
This island is another all-rounder within the Visayas region with everything from the powder-white beaches of Kalanggaman Island, Leyte Landing Memorial Park, known as Macarthur Park Leyte, (for the history buffs among you which was place that General MacArthur landed and gave his since famous quote “I shall return”) and the stunning Lake Danao (said to be shaped like a guitar!) for swimming, kayaking and fishing. For those interested in architecture or things that generally look very impressive and cool, Lake Danao is situated on one end of the longest bridge in the Philippines!
Samar
Perfect for: Adventures; off the beaten trackers
Tourist Spots in Samar: Sohoton Natural Bridge National Park; Langun-Gobingob Cave System; Torpedo Boat Adventure Ride in Ulot River
At the other end of the aforementioned ‘very impressive and cool’ bridge, is Samar, the third largest island in the Philippines! The perfect destination for the adventurous tourist with no time constraints, Samar is rugged with beautiful coastlines of hidden bays and towering cliffs coupled with a heavily forested and practically impenetrable interior. Samar is easily accessible (and not only via the bridge!) but is best explored by motorbike.
Negros
Perfect for: Divers to the South, history and culture buffs to the North
Tourist Spots in Negros: Casaroro Falls; The Ruins at Bacolod
Lonely Planet says Negros has the most to offer in the Western Visayas after Boracay and we would be hard pushed to disagree with the verdict.
It is the 4th largest island in the Philippines and as such has a huge variety of nature and culture to suit almost any traveller.
Broadly, the coast is inhabited by Visayans whereas the interior is inhabited by Negritos. To the west, Panay is widely spoken by the Negritos, to the east, it is Cebuano from Cebu. This unique mixture of cultures makes Negros a fantastic stop whilst backpacking the Philippines.
As well as cultural variety, the island has activities and sights for almost any traveller. The south coast is home to some of the best diving in the Philippines, the spectacular 30-metre Casaroro Falls in Valencia and the town of Dumaguete being the perfect base to explore this part of the island (and for connections to and from Cebu).
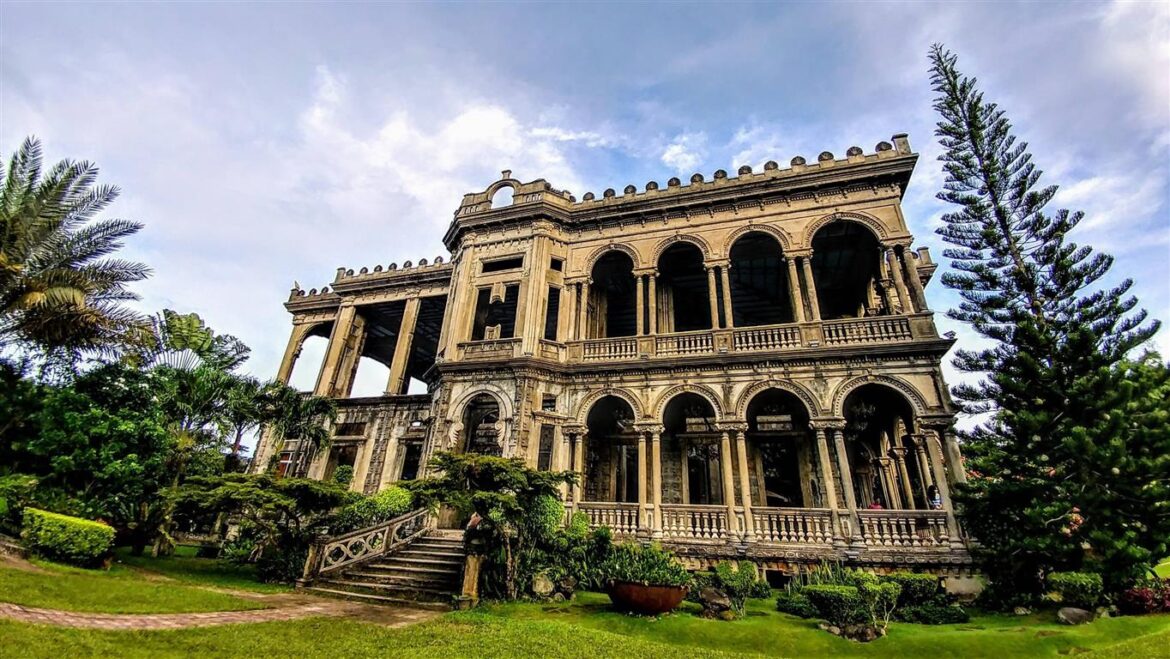
To the North, you can travel back in time with the spectacular ‘Ruins’, an early 20th-century Italian mansion which was destroyed by fire but of which the hugely impressive concrete frame remains (together with a café and Italian restaurant; which we suspect may not be original!). The Ruins are located near Bacolod which is also famed for its culinary treats.
The Region of Mindanao
Perfect for: Surfers, beach bums and those looking to get far off the beaten track
Tourist Spots in Mindanao: Camiguin Island, Siargao Island
The second largest island group after Luzon and is known as the “land of promise” due its rich biodiversity and resources. There are some incredible tourist spots in Mindanao, including the Enchanted River, the influencer’s paradise, a bright sapphire lagoon filled with tropical fish, Camiguin Island off the north coast is home to some of the best beaches in the Philippines, and Siargao Island is considered to be the Philippines’ surf capital.
It also has some vibrant and lively cities, including Cagayan de Oro and Davao (the Capital) and is home to some of the best scenery, nature and wildlife that the Philippines has to offer.
The tourism potential of Mindanao is huge, but alas, very few tourists make it past the north coast, if at all to the mainland. Why? There has been political unrest for many, many years and the situation today is ever-changing. During the 1970s, the Moro National Liberation Front (MNLF) started a war for independence on behalf of Mindanao’s Muslims and 17 years later, the Philippine government offered autonomy which was accepted, and in 1990, the Autonomous Region in Muslim Mindanao (ARMM) was created.
ARMM covers the provinces of Basilan, Lanao del Sur, Maguindanao, Sulu and Tawi-Tawi plus Marawi City. The radical Moro Islamic Liberation Front, blessed with the very unfortunate acronym ‘MILF’ refused to accept the 1987 deal and fighting has continued since. There are various other groups active in Mindanao that have connections to terrorist organisations and are funded mainly by robbery, piracy and kidnappings.
It is for that reason that the British government (and likely many other western governments) strictly advise against travel to western and central Mindanao and the Sulu archipelago. All but essential travel applies to the remainder of Mindanao with the exception of Camiguin, Dinagat and the Siargao Islands (those parts in the North that don’t connect with the mainland basically).
As ever, the situation on the ground can be different, and there are many accounts of tourists visiting Mindanao and feeling very safe. However, whilst getting off the beaten track is fun, it should never be at the expense of your safety. Equally, travel insurance can often be invalidated if you visit countries or regions specifically black-listed by your country so you should check that you are covered in that department.
If you are venturing into Mindanao, taking a local guide with you is recommended (as usually the target of robberies and kidnappings are westerners, on the assumption they have money on them, or wealthy families that will pay a ransom) and to avoid going out at night.
Accommodation for backpacking the Philippines
Types of Accommodation in the Philippines
There is accommodation in the Philippines to suit all budgets and types of traveller backpacking the Philippines. From 5-star luxury resorts and swanky villas to modest but private bungalows, back-to-basic cabins and lively hostel dorms.
If you’re backpacking the Philippines on a strict budget or would rather be spending your money on food, beers and activities, hostel dorms cost next to nothing with private bungalows (which we opted for during our visit) also being very cheap.
However, if you want a taste of the high-life, or are visiting the Philippines on a holiday, rather than for a backpacking experience, it is a great place to relax in style. Whilst they are expensive in comparison to hostels and bungalows, when compared with a resort of the same standing in other countries, they are a steal for what you get.
So, it might be worth splashing out for the experience, even if for a couple of days to split up the hostel stays.
Here are some of our recommendations of the best accommodation in the Philippines.
Best Places to Stay when backpacking the Philippines
In this section we round up some of our favourite places to stay in the Philippines. If you have stayed at any of these, or have other suggestions for our list, we’d love to hear from you!
Manila
Z Hostel
Located in the hip neighbourhood of Makati, Z Hostel is described as a “social hostel” where rest, sleep and comfort are important, but socialising takes centre stage.
With an incredible rooftop bar with a gorgeous view of Manila, it offers a free walking tour, as well as organising other activities in and around the city.
The rooms are spacious and comfortable, the staff friendly and helpful and a fantastic free breakfast is waiting for you in the morning to soak up those drinks you enjoyed on the roof the night before. A great venue for those looking to make some travel friends to socialise with.
Alicia Apartments
If you are not intending to visit Manila, instead opting to fly out to the islands at the earliest opportunity, then Alicia Apartments is perfect. A comfortable and clean place to rest your (maybe jetlagged) head for the night, before heading back to Manila Airport to begin your island-hopping adventure. It is only 0.6 miles from Manila Airport and it offers a free shuttle bus (which actually did turn up on time so no fear there!).
Puerto Princesa, Palawan
Guni Guni Hostel
Guni Guni is a 4-dorm hostel that can accommodate 30 people and it’s the bunks that really sell this place. Clean spacious rooms with bed pods which have a large ledge for all of your belongings as well as charging ports for your electronics. The hostel serves tasty food as well as ice cold beers and delicious cocktails in its chilled-out resto/bar where you can meet other travellers.
Sabang, Palawan
Café Sabang
For a real back-to-basics experience, Café Sabang is where it’s at! There are no mod-cons here, with very simply furnished rooms. There are bunks, single rooms and budget double rooms available and for the location, it is ridiculously cheap.
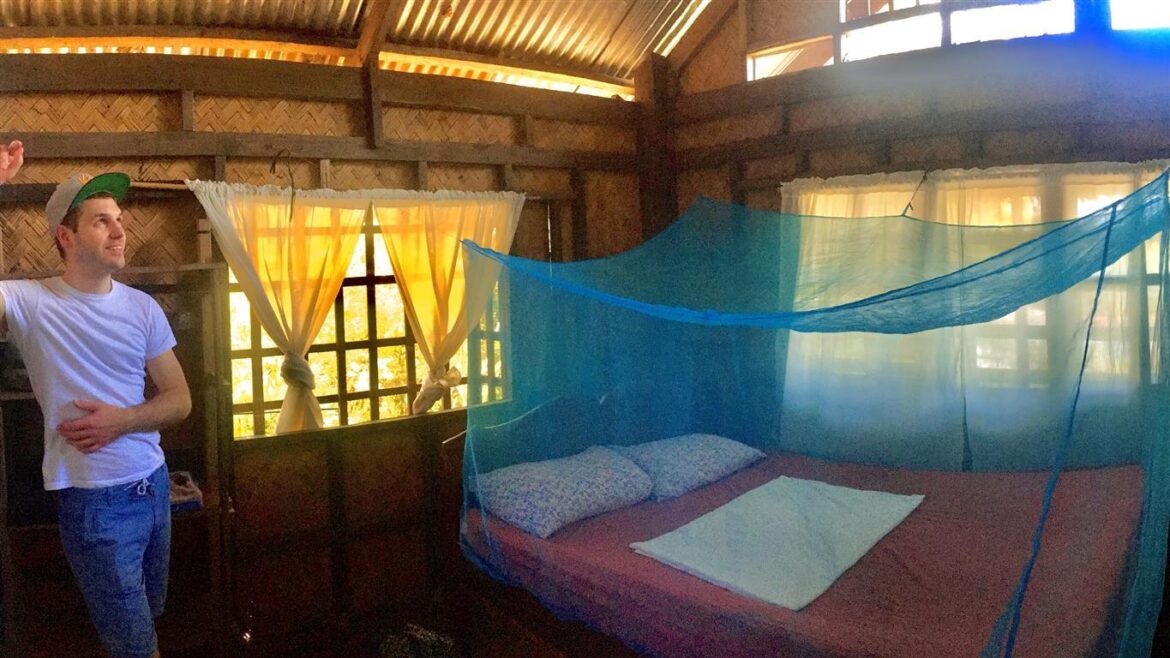
If you’re willing to give up a few luxuries (you can only charge your electronics in the reception area between certain times) then this is the place to stay. Ideally located just a short walk from the departure point of the underground river tour and Sabang Beach (mentioned above).
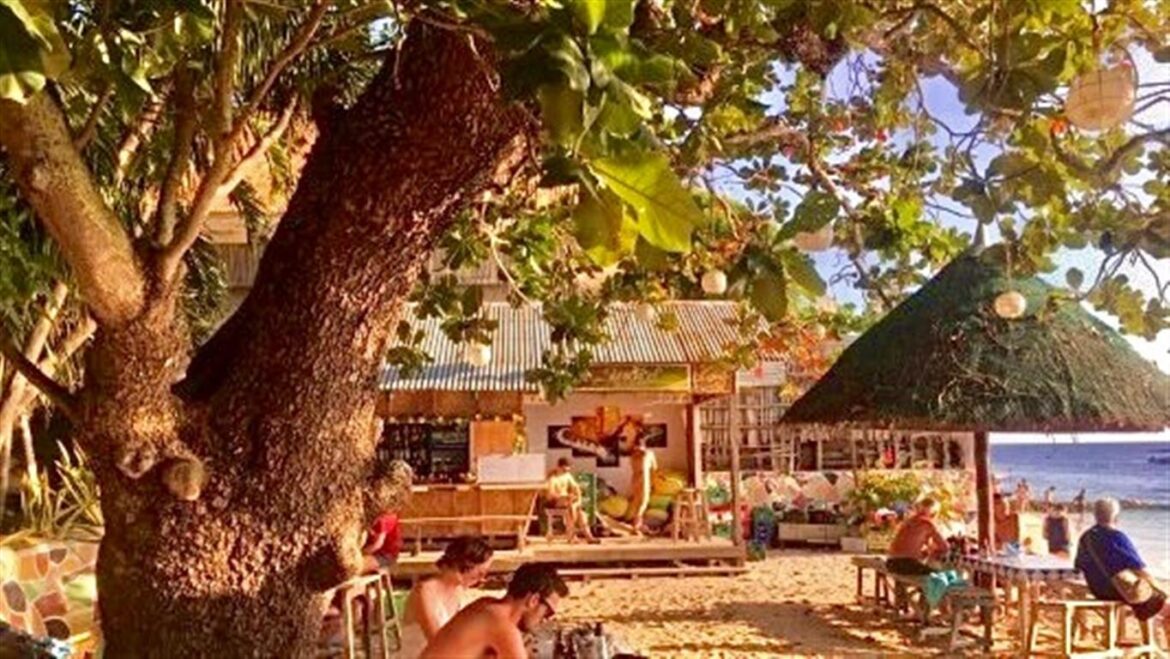
El Nido, Palawan
It is worth noting that El Nido is known for its somewhat rundown aesthetic. It is a town which wasn’t ready for the massive influx of tourists and the infrastructure has not caught up with the growth in popularity which means its sanitation systems are a bit…dodgy and the town itself is a bit dirty and run down in places. It’s also quite expensive to stay there for what you get.
That said, it was still one of our favourite places (despite getting sick here) and we’d still recommend you go and check it out. There are some resorts and hotels opening outside of the centre of El Nido, in Caalan Beach and Corong Beach which are a very nice alternate option if the centre is not your vibe.
Check out my Mini guide; Things to do in El Nido for more details of what to do and where to stay during your trip.
Chislyk Inn (Bungalow)
Located outside of the busiest part of the town, but still on Hama Street (the main road in El Nido) with a five-minute walk to the hustle and bustle. The cottages are based right on the beach and are a little quieter than up the road, allowing you to enjoy the town but also get a decent night’s sleep!
Tandikan Apartments
Located in a similar area to Chislyk Cottages, on the same stretch of beach, Tandikan offers both fan and air-conditioned cottages, and the price includes breakfast, which is basic, but does the job before setting off early for a day of island-hopping in El Nido!
We found the cottages to be basic, but clean and comfortable with a lovely view from the veranda to enjoy breakfast from, before heading out to the islands.
Frendz Hostel
Frendz hostel offers 6 bed dorms, family and double rooms and A POOL! This is a fantastic option if you want to visit El Nido but avoid the chaos of Hama Street. It has a restaurant and a bar too where you can enjoy some spectacular El Nido sunsets. A bit more expensive than the hostels on Hama Street, but you get big bang for your buck here.
Cadlao Resort and Restaurant
Cadlao Resort is located in a quiet, relaxing spot away from the town but close enough to walk in. The staff are friendly, food is good and the rooms are clean and comfortable. It’s the view and the pool that sells this place though – the perfect spot to enjoy the sunshine after a busy few days exploring everything El Nido has to offer. For that reason, booking in advance is essential here.
Boracay, Visayas
Mad Monkey Hostel
This hostel is a great place to have fun and let your hair down – free shots every hour! The Hostel organises lots of activities including cliff jumping and boat parties making it a great place for solo travellers who like the party scene as it’s easy to meet others who are backpacking the Philippines! The dorm beds are also separated by walls here, giving the dorms a much more private feel.
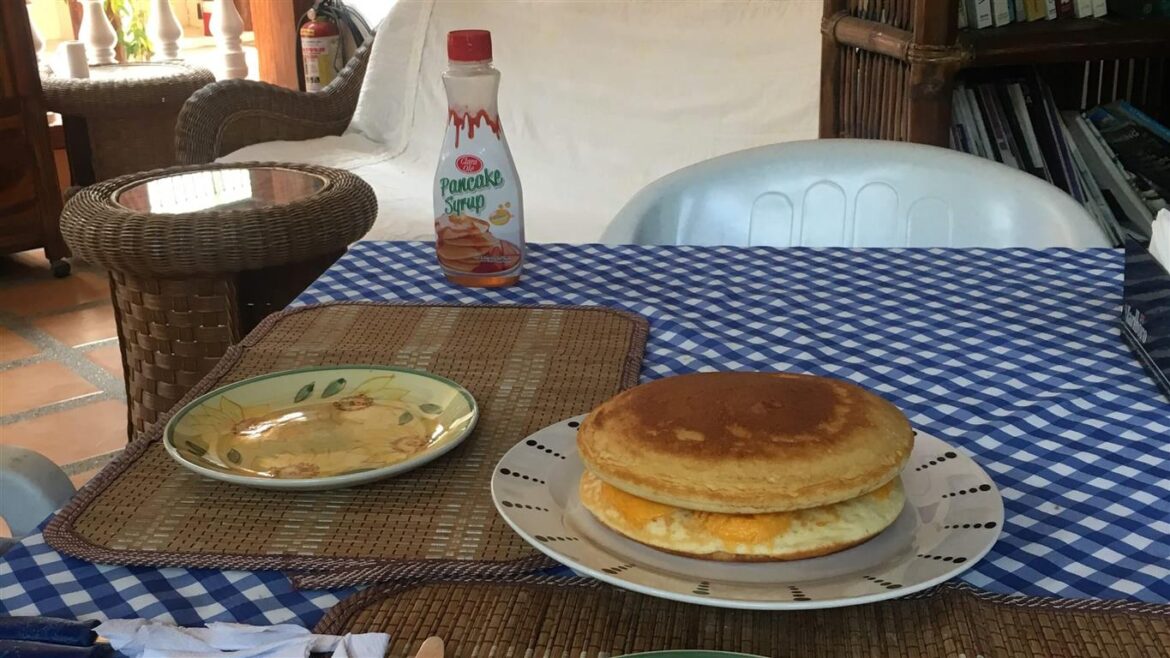
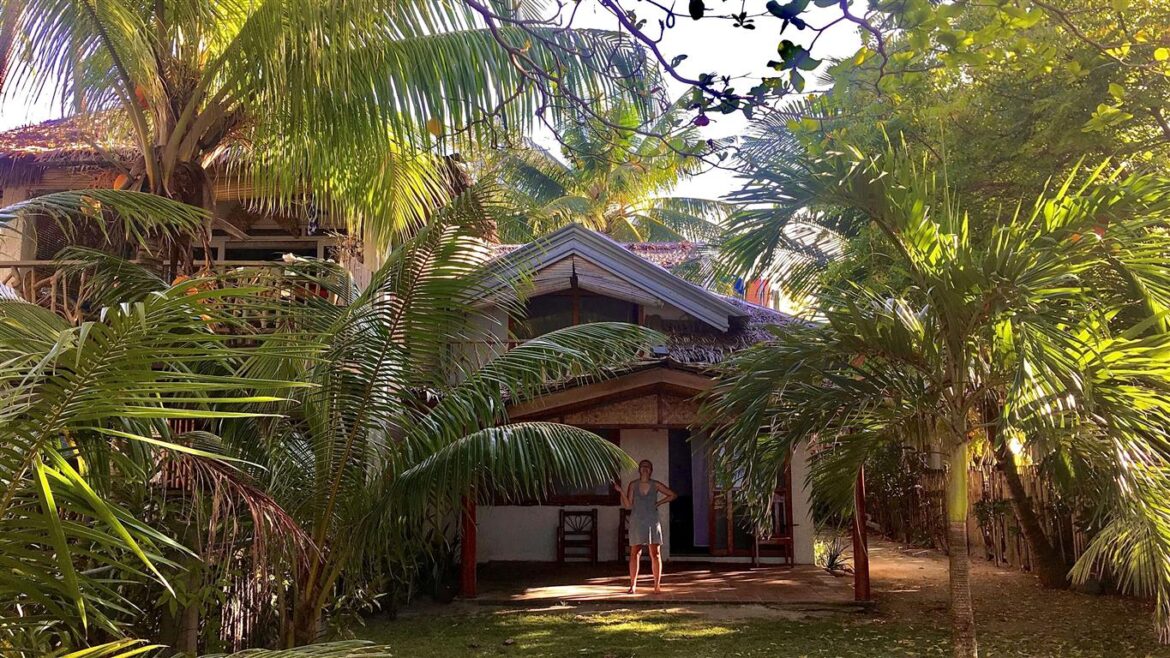
Dave’s Straw Hat Inn (Bungalow)
Dave’s Straw Hat Inn is a little hidden gem slightly off the main road but just a few minutes walk to one of the best beaches in the Philippines and Boracay’s main attraction, White Beach.
Located in the more quiet and relaxing station 3 but only a 10-minute walk to the more lively Station 2, the apartments are really comfortable and surrounded by lovely well-kept gardens, with a restaurant in the centre. The pancakes are a must try – seriously, they must be seen to believed. One portion is enough for two!
Henann Crystal Sands Resort
This beachfront resort, outdoor swimming pools and sunken pool bar…need I say more? Located between Station 1 and D’Mall, so it is close to all restaurants, bars and supermarkets whilst also being on the best stretch of beach.
Check out our Beaches of Boracay blog for more accommodation suggestions as well as the low down on the best beaches, when to go and where to eat and drink when you get there!
Dumaguete, Negros
Harold’s Mansion (Hotel/Hostel)
A self-confessed “no-frills” hostel offering budget-friendly accommodation in a good location for exploring Dumaguete on foot and located close to the ferry which departs to other islands. The hostel will help you organise tours and point you in the direction of the best things to do in and around Dumaguete. We loved the rooftop bar which offered great views of the city as well as hosted some great pool competitions between Aaron and I!
Cebu City, Cebu
Mad Monkey Hostel
The same hostel brand as in Boracay (see above), the Mad Money Cebu City Hostel is 15 minutes from the best tourist spots in Cebu City and offers both budget-friendly dorm rooms as well as private rooms. The perfect hostel for socialising and having a good time (and getting on the beers!) there is an infinity pool and sun deck and the best DJs in town spinning some tunes in the evening. The rooms are also cosy and clean, not that you see much of them here.
Moalboal, Cebu
Chief Mau (Hostel)
Chief Mau is a great option for solo travellers who want to meet other backpackers but avoid the all-night parties. Perfectly located on the beach, complete with a bar and restaurant, this hostel has a great chilled out social area where people can relax in hammocks or have a drink in the garden area. The hostel arranges day trips including canyoneering to Kawasan Falls and surrounding areas, and island-hopping and the guides are both great fun and professional.
Tipolo Beach Resort (Bungalow)
Tipolo features beautiful hut-style rooms located right on the beach but a short walk into the town and very close to some spectacular spots for diving in the Philippines. There aren’t many rooms here so it’s best to book in advance if you want to guarantee your stay. The restaurant serves AMAZING food, so good it’s always busy.
Siquijor
Chillout Hostel & Bar
Chillout is conveniently located by Larena Port and to the centre of Larena, this beautiful hostel is a great place to relax and enjoy the terrace by the edge of the sea. The hosts of this hostel, Rowena and Michael go above and beyond for their guests and this is reflected in the reviews. Give them a read – there is nothing but positive comments about this place!
The Bruce (Bungalow)
Unbelievable cottages which are spacious, clean and comfortable. They are located right on the beach and you can walk all the way down to JJ’s (below) if you want for dinner. The sunsets really are something special. Each bungalow has a hammock and a garden area to sprawl out and relax.
JJ’s Backpackers Village
Offering dorm and private rooms of various sizes, JJ’s Backpackers Village is a little piece of paradise. The sunsets from the private beach are spectacular and you can eat from their restaurant right on the sand and watch the sun go down. Perfect for all types of traveller backpacking the Philippines on a budget.
For more accommodation options as well as a complete guide to the island of Siquijor, check out our Tourist Spots in Siquijor blog.
Bohol
Nuts Huts
The best place to stay in Bohol if you want to get up close with nature! Set in the middle of the jungle on the bank of the Loboc river, Nuts Huts is made up of a few comfortable wooden cabins where you fall asleep listening to the sounds of the jungle around you. There is no Wi-Fi which means a few days of truly switching off.
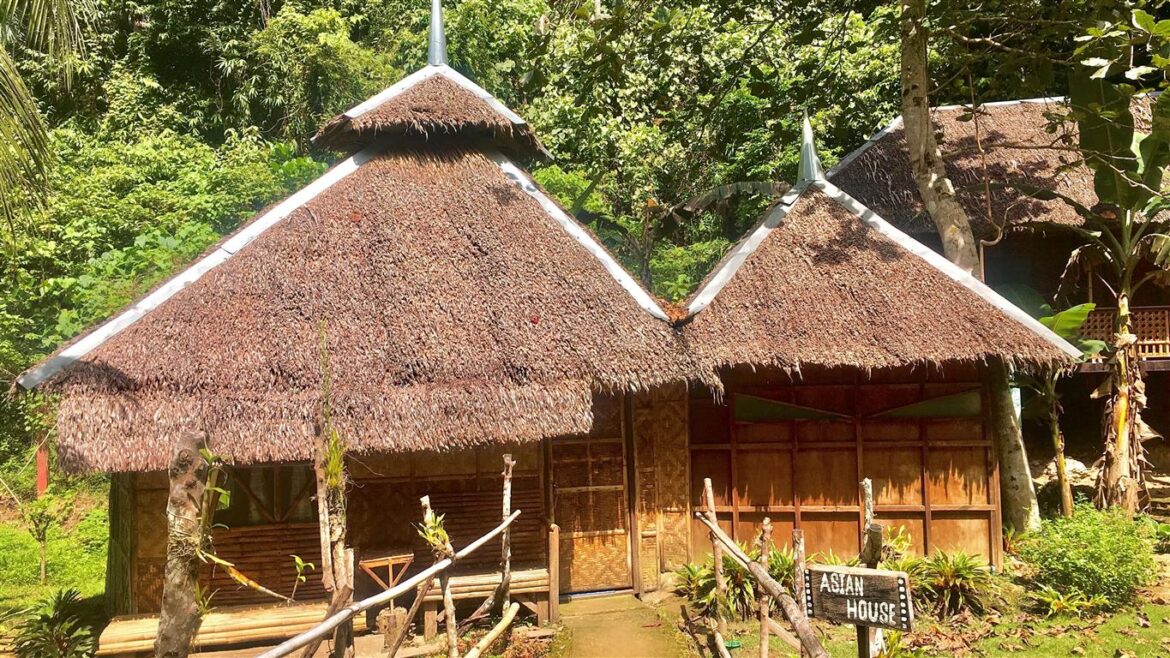
It’s right next to zipline and you can take kayaks up to Busay Falls. The food is great – just be prepared for the 100 steps and the less than comfortable access road to get there – it’s in the jungle after all!
Check out our other blogs on Bohol for more details on where to stay and why you should visit this amazing island!
[INSERT BOHOL BLOG CAROUSEL]
Budget for backpacking the Philippines
If you’re backpacking the Philippines on a budget, you’re in for a treat because not only will you have a decent place to rest your head, but you’ll also be able to eat at a nice restaurant, drink a few beers AND head out for a tour for around £20 a day, perhaps even less depending on where the tour is.
By way of example, on our first trip to the Philippines, we went for 3 weeks. We each saved a £1,000 each (£2,000 budget) which was to cover accommodation, internal flights and transportation, food, drink and tours and excursions. We didn’t hold back, and we did many tours, mostly staying in bungalows/cottages. We were probably mid-range travellers, rather than budget or luxury.
We returned to the UK with £800.00 meaning we had spent £600 each for the whole trip. We also went in “high season” when most things are at their most expensive. As a rough guide, I would suggest you budget as follows:
| Expense | Budget | Mid-Range | Luxury |
| Food & Drink (incl. Alcohol) | £5-£8 | £10-£17 | £20+ |
| Transport | £4-£9 | £10-£18 | £25+ |
| Accommodation | £5-£8 | £10-£18 | £30+ |
| Tours/Activities | £0 – £12 | £11-£18 | £25+ |
| Total: | £14-£37 | £41-£71 | £100+ |
TOP TIP: Time vs Money. You may wish to spend a little extra on transport by paying for internal flights if you are island hopping when backpacking the Philippines. If you have a limited time, you will need to do this to get to and from some of the islands as the distance is too vast to travel by other means. If you don’t have the budget to do so, perhaps you should plan to travel only one island or a couple of islands that you can get to by boat. The budget travel column above assumes that as a budget traveller, you will not be spending cash on internal flights.
Food and Drink
Local Cuisine
Given its history, Filipino cuisine is a mixed cuisine incorporating flavours of Malay, Spain, China and the United States. The influences of the East and West are what make Filipino cuisine truly unique, and delicious! It’s no-fuss cooking with big flavour. Here are some of the most popular Filipino dishes that you must try when backpacking the Philippines.

Adobo
The heart and soul of Adobo is vinegar, with the other main ingredients being soy sauce, garlic, bay leaf and peppercorn. Usually made with chicken or pork and served over a bed of plain white rice which really brings out the sweet and tangy sauce. A delicious, traditional Filipino dish.
Sisig
Not wanting anything to go to waste, this dish is made out of the, shall we say, less desirable cuts of pork. We’re talking ears, snout and cheeks cooked with garlic, onion, chilli and (you guessed it) vinegar, served on a sizzling hot plate. Whilst it sounds like a dish not for the faint-hearted, it was declared as “arguably the best pork dish on earth” by the NY Times. So, don’t knock it before you’ve tried it.
Filipino Spaghetti
Want a taste of the West with a Filipino twist? Filipino spaghetti is the Philippines’ answer to Spaghetti Bolognese with the addition of sweet banana ketchup. This dish is super popular in the Philippines and you can find it at most Filipino fast food joints.
Drinks
Beer
Beer is one of the most popular alcoholic drinks in the country with San Miguel and Red Horse being the most popular beers here. San Mig Light is the most common, probably because it is a real beach beer – refreshing and light (as the name suggests).
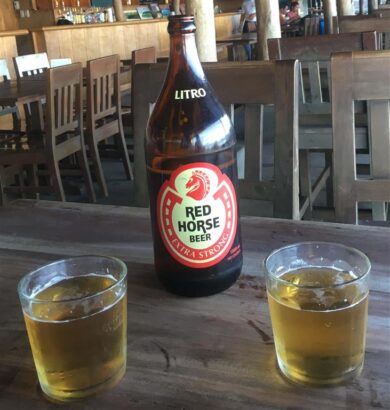
Red horse (made by San Miguel) is equally delicious but is a strong, high alcohol beer – not as suitable for the beach but just as delicious.
Tanduay Rum
One of the most popular alcoholic choices in the Philippines, a sweet and silky rum. It is often shared around at the end of the day after a busy tour or activity. Our first experience was after day 1 of island hopping in El Nido where we shared it with our guide and our fellow backpackers under the palm trees on Seven Commandos Beach – paradise.
Buko
A natural drink that you’ll see everywhere when backpacking the Philippines. Buko is a young coconut. The “juice” is both hydrating and filling and once you’ve finished drinking, the vendors will usually chip a bit of the shell off for you to use as a makeshift spoon to scrape off the coconut meat inside.
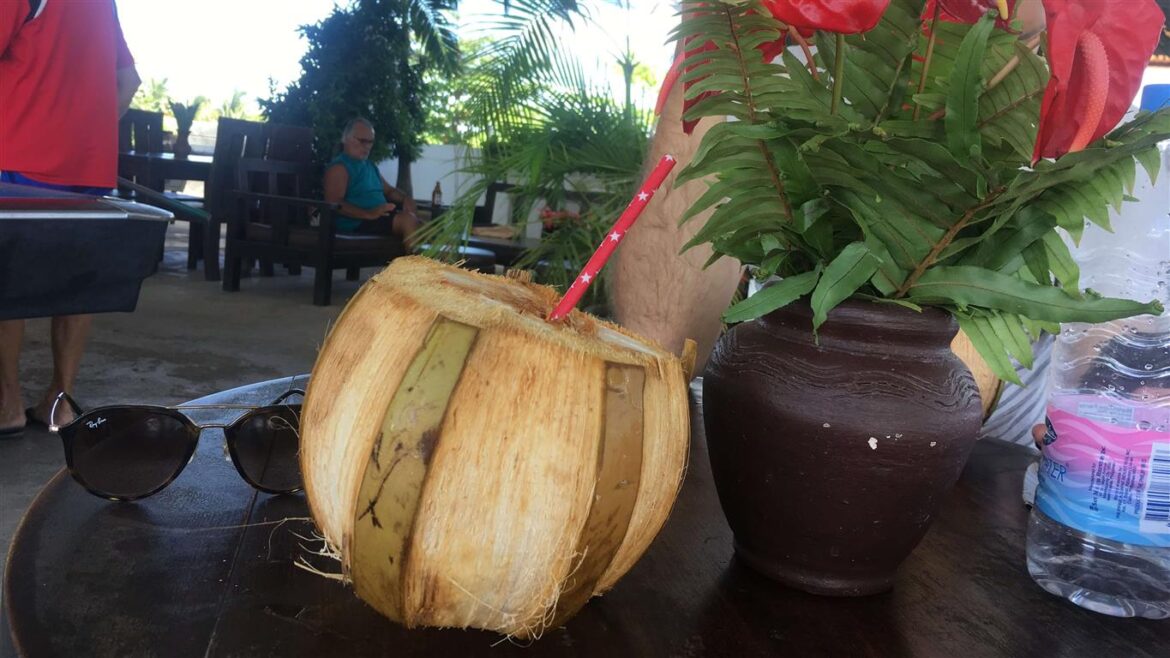
Top Tip – enjoy with your reusable metal straws and refuse the plastic.
Calamansi Juice
Also known as Filipino lemonade, Calamansi is a citrus fruit similar to lemon and limes and is very tart so it often comes with some sugar or honey to sweeten to taste. If you’re feeling a little run down, Filipinos often drink calamansi juice if they have a cold.
Filipino Culture
Many articles describe Filipino culture as where East meets West. It is not surprising, given its history, that it is a place which embraces the best of both worlds.
The dominant religion in the Philippines is Roman Catholic, which was likely introduced by the Spanish given the Philippines was part of the Spanish Empire for 300 years. This is reflected in the architecture of the buildings (particularly in the beautiful churches) which have a very colonial look to them. Some of the buildings in the Philippines could quite easily be confused as European or Latin American.
If you are into architecture, head to Manila (check out the Zuellig Building in Makati, Intramuros and San Augustin Church) and Calle Crisologo in Vigan City (a Unesco World Heritage Site) to see the best of this.
Another great influence is clearly American culture. The Filipinos we met were really into the NBA and the food can be very western. Of course, the American influence is also reflected in the language with most Filipinos speaking English (see Language).
Finally, family comes first in Filipino culture and it is common for three or four generations to live together in the same house. They look after each other and value time spent together. We saw three generations living together next to the hostel we stayed in, in Sabang – which seemed completely alien to us Brits!
Language and Communication
Keeping in mind that the Philippines is made up of over 7,000 islands, it may not come as a surprise that it is one of the most linguistically diverse countries, with some 120-180 languages being spoken. Luckily for those of us backpacking the Philippines, there are only 2 officially recognized languages – Filipino and English.
We did not struggle to communicate at all and most people we met spoke good English so you will find it easy to get around this country!
Brief History of the Philippines
The Philippines was originally occupied by the Negritos who migrated from Borneo, Sumatra and Malaya some 30,000 years ago. Islam was introduced to the Southern islands in the 14th Century by Arab traders from what is now Indonesia, which eventually extended into Luzon. In fact, if it wasn’t for the Spanish occupation of the Philippines from 1564, who in turn, brought Catholicism with them, it is likely that the Philippines would predominantly be an Islamic Country today.
300 years of Spanish occupation followed, plus 50 years of U.S. control, which included during WW2 (remnants of which can be seen across the Philippines), when finally the Philippines gained its long awaited independence in 1946. For a more detailed guide into the history of the Philippines, check out our blog!
Best time for backpacking the Philippines
Weather in the Philippines
The Philippines is a tropical country and as such has two seasons:
- The dry season. Runs from November to May. May is the hottest month in the Philippines, often reaching 35C+ (95F) and is very humid.
- The wet season. Runs from June and October. Typhoons usually hit the Philippines between August and October.
As a result, you should consider the following when planning your trip:
- Your tolerance to heat and humidity
If you struggle with the heat, you are probably best backpacking the Philippines in the “colder” months of November – February where the weather is more refreshing (on average 25C/77F).
We arrived in the Philippines on 18 February and were there for three weeks. The weather was very warm, and mostly we enjoyed clear-blue skies and sunshine. There were a couple of days where it was overcast but dry, and there was a storm in the evening in Boracay which soon passed but generally, it was glorious sunshine and between 25-30 degrees.
- What you plan to do when backpacking the Philippines
Do you want to go diving in the Philippines? Are you looking to island hop and spend most of your time at the beautiful beaches in the Philippines? The weather will be a key consideration to these.
The wet season will have a direct impact on both, as the unpredictable weather can affect visibility in the water and torrential downpours are more common which you may wish to avoid if you’re working on your tan!
December to April is considered “high season” where prices are at their highest and there are the most tourists about. Shoulder season, November & May can be a great time to visit to avoid high prices but when the weather is also good!
- Typhoons
These hit the Philippines between July and October, but the effects of climate change have made them rather more unpredictable, and whilst unlikely, they have hit as late as January.
The advice is generally to avoid those months, if possible, because rain can be torrential and dangerous and can cause transportation issues and cancellations. However, if you find yourself there during those months keep an eye on whether typhoons are forecast and avoid heading into those areas. Some areas, such as Palawan, are less susceptible to typhoons.
This is a basic and brief assessment of the Philippines weather. It actually has four separate climates meaning the weather changes depending on where you go, which I suppose is expected with a country with over 7000 islands. Once you have decided on the places you’ll visit, check out Meg’s Minis which give more in-depth information into each place specifically.
[INSERT MEGS PHILIPPINES MINIS BLOG CAROUSEL]
Festivals and Holidays
The Philippines love to celebrate, and they have many festivals throughout the year. Given they are largely a Catholic country, Christmas and Easter celebrations are huge and if you are visiting during this time, you will need to be more organized and book your travel and accommodation in advance to avoid disappointment.
As with any country, many public holidays vary from year to year but for 2022, the following have been announced so far:
| 1 Jan | Sat | New Year’s Day |
| 1 Feb | Tue | Chinese New Year |
| 25 Feb | Fri | EDSA Revolution Anniversary |
| 9 Apr | Sat | Day of Valor |
| 14 Apr | Thu | Maundy Thursday |
| 15 Apr | Fri | Good Friday |
| 16 Apr | Sat | Black Saturday |
| 1 May | Sun | Labor Day |
| 3 May | Tue | Eidul Fitr |
| 12 Jun | Sun | Independence Day |
| 9 Jul | Sat | Eidul Adha |
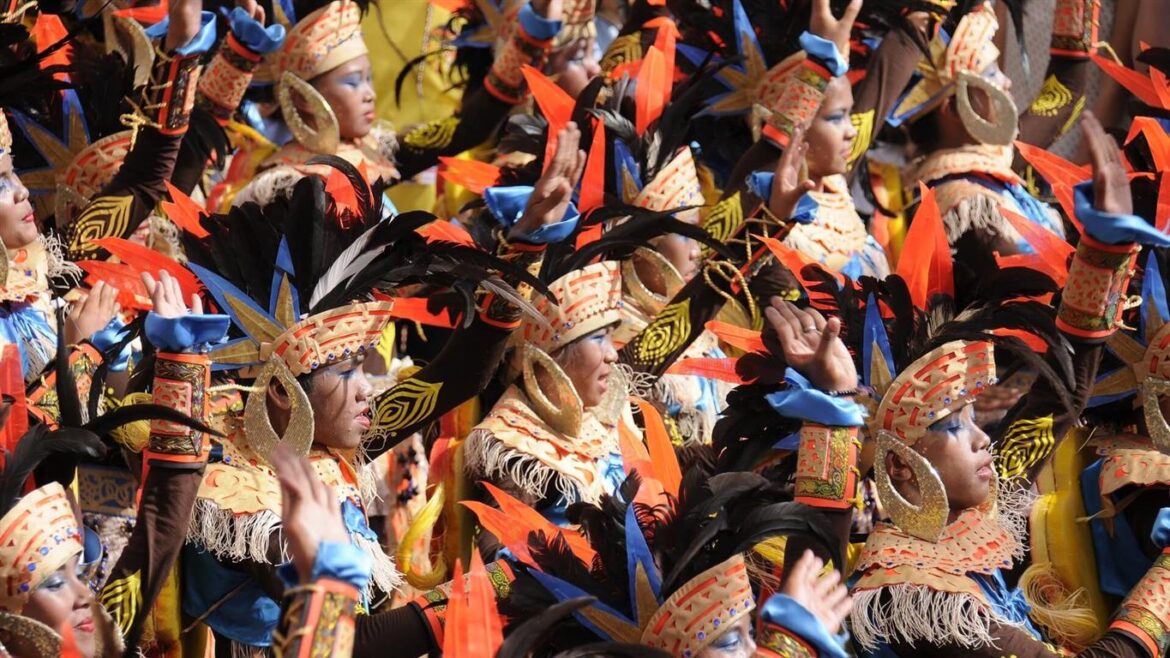
If you are lucky enough to be backpacking the Philippines during a festival then you should do everything you can to be there! They are surreal with big bold colours, magical outfits, singing, dancing and will transport you away from any worries you may have to a place of pure joy!
The Filipinos are so welcoming and friendly that you will find yourself swept up in the excitement from the moment you arrive and the experience will leave you with some memories to treasure forever.
Below is a list of the biggest and best festivals for you to keep an eye out for when backpacking the Philippines!
1. Sinulog Festival – Cebu
Date: 11 January to 20 January 2022
Location: Queen City, Cebu
Sinulog means “like the water current” and describes the typical dance performed during this fiesta.
This festival celebrates the patron saint of Cebu, Santo Niño and is a week-long festival full of processions, parties, concerts and street dancing!
For more information take a look at this great blog by Zen Rooms.
2. Ati-Atihan Festival – Panay
Date: expected to be 16 January to 23 January
Location: Kalibo, Panay (close to Boracay Island)
This festival also celebrates the patron saint, Santo Niño and is one of the oldest religious festivals in the Philippines, being described as the mother of all Filipino festivals!
If you are visiting Boracay you will likely arrive into Boracay airport (also known as Caticlan airport) which is in fact on the island of Panay before a ferry takes you over to Boracay. This festival takes place on the island of Panay, in Kalibo which is around 90 minutes west of Boracay airport and so if you are spending some time on the Boracay beaches (or on Panay), this festival is one not to be missed.
You can expect extravagant and colourful costumes, street dancing, chanting, drums, singing and lots of food and drink.
Zen Rooms have this one covered too!
3. MassKara Festival – Bacolod
Dates: expected to be October 2022
Location: Bacolod, Negros
MassKara derives from the words for many (mass) and faces (Kara) and so is translated to the Festival of the Many Faces. As the name suggests, you can expect masked dancers as well as plenty of dancing, singing and partying at this fantastic cultural festival.
Compared to Notting Hill Carnival in the UK, this is one not to be missed if you are backpacking the Philippines during October.
Another in-depth look at this festival by Zen Rooms is here.
These are just a taster of the many religious and cultural festivals that take place every year throughout the Philippines. I have picked those major festivals that are held near traditional tourist spots in the Philippines or places described in this blog. If you are travelling to other islands and cities then do make sure to have a look at the Philippines festival calendar in advance!
Whilst festivals are a fantastic opportunity to party with the locals and get a real understanding of local culture and the influence of religion, they do come at a cost – literally! If a festival is taking place in the town/city/island at the same time as your visit, then you can expect accommodation to become booked up months in advance and any available accommodation to be much more expensive than usual.
If you’re the kind of person that likes to turn up and book accommodation on the spot then this is certainly possible when backpacking the Philippines but do double check for any upcoming festivals as you may need to book your accommodation early on those occasions. Otherwise, head out with the locals and have a truly unforgettable time.
Getting to the Philippines
Flights to the Philippines
The increasing popularity of backpacking the Philippines as well as many Asian airlines offering long haul, international flights, means there is more choice at more competitive prices.
The two largest international airports in the Philippines are Ninoy Aquino International Airport on the outskirts of Manila, the capital City of the Philippines and Mactan-Cebu International Airport in Cebu City, the second largest city in the Philippines.
There are other international airports in the Philippines as I mention below and so if you are travelling to the Philippines from within Asia, it is possible to land at one of the other airports mentioned below.
However, even from within Asia, flights to Manila and Cebu are likely to be the cheapest and most frequent and so for anyone backpacking the Philippines, I would begin with the assumption that your very own adventure will begin at one of those two airports, and most likely Ninoy Aquino in Manila.
More information about each of these airports can be found here:
Either of these two airports are ideal for starting your adventures in the Philippines so I would not prefer one to the other and so I would be guided by price and flight times. Both airports offer an excellent opportunity to explore their respective islands:
- From Ninoy Aquino you can visit the capital City of Manila as well as its island of Luzon which is home to the Batad Rice Terraces and the Mayon Volcano National Park amongst others and as we looked at earlier in this blog.
- From Mactan-Cebu you can visit Cebu City as well as explore the island of Cebu including the amazing Kawasan Falls and the beautiful coastal village of Moalboal as mentioned here.
Further, as you would expect from two international airports, both offer fantastic internal links to just about any part of the Philippines, so once you are ready to move on, both provide the perfect place to grab an internal flight and explore a new island.
Equally, if you have had enough of flying by that point, both also provide ideal starting points for visiting other islands by boat. Cebu City is home to a huge shipping port which offers passenger connections to Bohol and Mindinao.
If your schedule allows then consider the unforgettable and epic 13-hour ferry journey from Manila to El-Nido via Coron. Read more about both El-Nido and Coron above.
If this has made you eager to start your planning, I would suggest heading over to SkyScanner to compare the cost and convenience of flights to both cities from wherever you are beginning your adventure.
Taxi from Manila Airport
If you have arrived in Manila after a long-haul flight, chances are you are going to want to jump into a taxi from Manila airport to your destination as quickly as possible.
Fortunately, there are plenty of options for taxis from Manila airport but these can vary hugely in price so do read the following and make a note of this before your flight; I know how easy it is to forget these tips after a long-haul flight when you are inundated with potential drivers!
There are two types of taxi from Manila airport; broadly speaking fixed-fare taxis and metered taxis and it is the metered taxis that you want to find as these are significantly cheaper.
As you might expect, it is the fixed-fare taxis that are at the doorway vying for your custom as soon as you leave the airport. These drivers are not at all pushy as you may experience elsewhere in the world, and in fact will often point you in the right direction if you ask them, but they will of course try and sell you their fixed-fare option. They often have laminated sheets of prices to show you that the fare is fixed and fair to all and so you are not being ripped off if you take one of these fixed-fare cabs, it is just that the metered taxis from Manila airport are significantly cheaper.
To give you a comparison, on our last trip to the Philippines we stayed at Alicia Apartments (which I mentioned earlier) because we arrived late at night and had a flight early the next morning to Palawan. Google Maps records the distance at somewhere around 1km from the airport allowing for navigating the airport itself. The fixed-fare drivers estimated it would take around 25 minutes (!) and quoted prices between P950 and P1550 (around $20 – $30). We eventually took a metered taxi which cost P106, around $2!
So, how do you find them?! They can be found in bay 19 of the airport, outside of the doors where the fixed-fare taxis are congregated. If you walk along the concourse, you should see a row of yellow taxis lined up – if you cannot see them just ask!
We have heard some reports of rigged meters being used in taxis from Manila airport. We have not experienced this ourselves but it is something to be bear in mind. Metered taxi rates are generally around P40 for the first kilometre and then P3.5 for every 300m or two minutes of waiting time after that. So broadly speaking, your meter should not be above P100 for the first 5 minutes of any journey in a taxi from Manila airport. If it is significantly higher than that then you could be on a rigged meter and you may wish to stop and change taxis when you can.
Here are our top tips for getting a taxi from Manila airport:
- Leave the airport into the taxi rank and head to rank 19 where the yellow metered taxis are located (the fixed-fare taxis are white);
- Ensure your driver turns on the meter when you get in the car. Most drivers do but if they do not, ask them to do so;
- If the driver says the meter is broken then either change taxis or negotiate a fixed price (on the basis of metered rates as opposed to the fixed-fare prices mentioned above!);
- Watch out for rigged meters and keep an eye on your meter; it should not be above say, P100-150 after the first 5 minutes of leaving the airport;
- A final option is Uber which has made its way to the Philippines. The Uber rates are similar to metered taxis so this can be a convenient alternative if you are arriving late and/or are tired – as long as you have internet access and/or can connect to the airport WiFi;
- Make sure you have a written address, and preferably a map, of your hostel/hotel/destination especially if you are staying outside of the city itself (such as at Alicia Apartments).
So generally, my advice is that taxis from Manila airport are fairly straightforward once you know what is going on. No-one will give you a price ‘off the top of their head’ and so if you wish to take a fixed-fare cab, you can do so in the knowledge that your fare is the same as every other fixed-fare ride.
Entry and Visa Requirements for backpacking the Philippines
Entry into the Philippines is by no means as difficult as for some countries in the world but there are, as ever, specific rules that you need to be aware of to avoid any issues when landing in the country.
Those requirements will vary depending on which country you are flying from as well as your country of origin and so I would highly recommend that you check your own government’s website for advice on entry requirements specific to your departure and native country.
Below are some of the more general entry requirements to bear in mind:
- Your passport must be valid for at least 6 months after your planned departure date from the Philippines so make sure you check its expiry date before you book!
- You will need a round-trip itinerary – in other words you must have a flight/boat or some other method of leaving the Philippines at the end of your stay booked in advance;
- You may need to show hotel/hostel/Airbnb bookings on arrival;
- You may be asked to show ‘proof of financial means’. For those of us backpacking the Philippines, this can include a screenshot of your bank account showing you have sufficient money for your trip or even as simple as showing you have a credit card on you (these checks can be very lax, but you should be prepared just in case!);
- Visa requirements for the Philippines depends on the length of your stay and your country of origin. Again please please check this before you travel as these requirements can change. Generally speaking, most nationals are permitted to enter the Philippines for up to 30 days without a visa (and 59 days if you are from either Israel or Brazil). This website has an up-to-date list of the current visa requirements as well as further information specific to various countries.
Covid Update
As at September 2021, the Philippines has recorded 2.47m cases of infections and 37,400 deaths.
Currently, all visitors to the Philippines must apply for and obtain a health declaration form, known as an e-CIF before entering the country. You can apply for your e-CIF here.
Covid related entry requirements to the Philippines very much depends on your country of origin and therefore which coloured list your country is on. Generally speaking, all foreign nationals who are permitted to enter the Philippines (i.e. their country of origin is not on the red list) must undertake 14 days of quarantine on arrival with further requirements if you are not fully vaccinated.
I would strongly recommend consulting your government’s website for updated travel requirements to the Philippines. For those in the UK, these can be found here. I would also recommend checking that information against the Philippine Bureau of Immigration website here which posts updates to its red, yellow and green lists.
Travelling around the Philippines
Travel by Air
As mentioned above, the two main international airports in the Philippines are located in Manila and Cebu and it is likely that if you are arriving from outside of Asia you will arrive at one of these two airports.
From here, there are various airports throughout the Philippines for connecting flights; the most significant of these being Caticlan Airport in Boracay; Puerta Princesa airport in Palawan; Davao airport serving Mindinao; Clark Airport in Luzon to the north of Manila and Bacolod-Silay airport serving Negros.
There are further smaller internal-only airports which have fewer daily flights but can be a godsend when backpacking the Philippines on a tight schedule. One such example is the small airport in Palawan at El Nido which can not only save you the travel from Puerto Princesa to El-Nido but can also connect you to various destinations in the Philippines including Boracay.
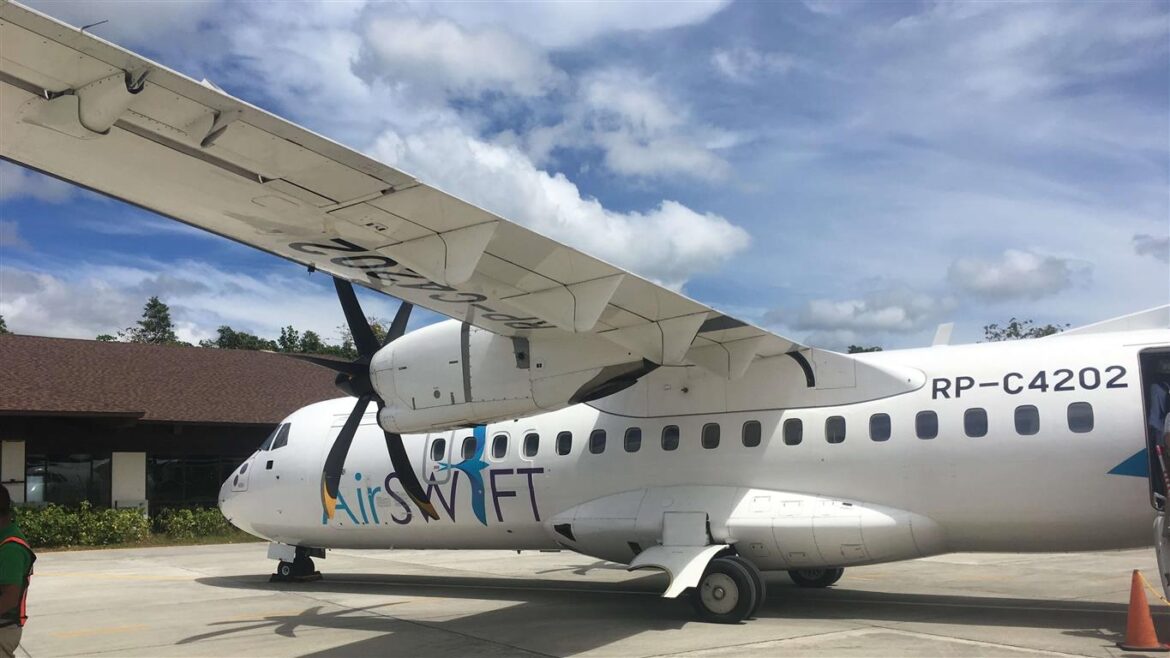
The main internal airlines are Air Swift, Air Asia, and Cebu Pacific who run internal flights between the main islands, particularly those that you couldn’t travel between by boat, as the distance is too far. Many people arrive from their home countries into Manila, then leave immediately heading out to the islands.
Internal flights are quite affordable (see Budget for detail on costs). However, in true Philippine style, the flights were often surrounded by confusion over where the plane would be departing from, with a last-minute scramble to the opposite end of the terminal, and it would inevitably be late, but other than that, it was all very straightforward in the end!
Check the flight times and cost using Skycanner or Kayak as this will pick up the cheapest internal flight available to you.
Travel by Boat
As many of the islands on the tourist trail are close together, travelling by boat when backpacking the Philippines is very popular, easy and cheap. Despite this, they don’t run so often so you may need to arrive at the ticket office early to guarantee yourself a seat on the boat, particularly if travelling during high season.
TOP TIP: If you know it, book your departure as soon as you arrive in a place. It’s likely that you’ll be leaving from the same place that you arrive (unless you are catching a flight out). This is important if you are short on time and have to follow your itinerary strictly – you don’t want to be staying somewhere an additional day because you couldn’t get on the boat – that time is too precious!
You will see some incredible sights when travelling by boat particularly because the boat journeys are often early in the morning (to make the most of the day) so you get to see the sun rising over the ocean and it’s the perfect temperature for travelling. However, the journeys can sometimes be rather choppy, and the boats can be small and hot so make sure to take motion sickness tablets if you suffer (like I did) to avoid any awkward hanging over the edge of the boat moments.
Travel by Bus/Jeepney
For longer over-land trips, the Filipino public bus system comprising mainly of Jeepneys is both cost-effective and an experience not to be missed. Known as “The King of the Road”, the Jeepney is one of the greatest and cheapest methods of travel when backpacking the Philippines. A remnant of WWII, they US Willy Jeeps left in the Philippines by US forces after the war, converted into public buses. Used by tourists, locals and also farmyard animals, they are a real Philippine icon and great for getting a glimpse into Philippine culture and life.
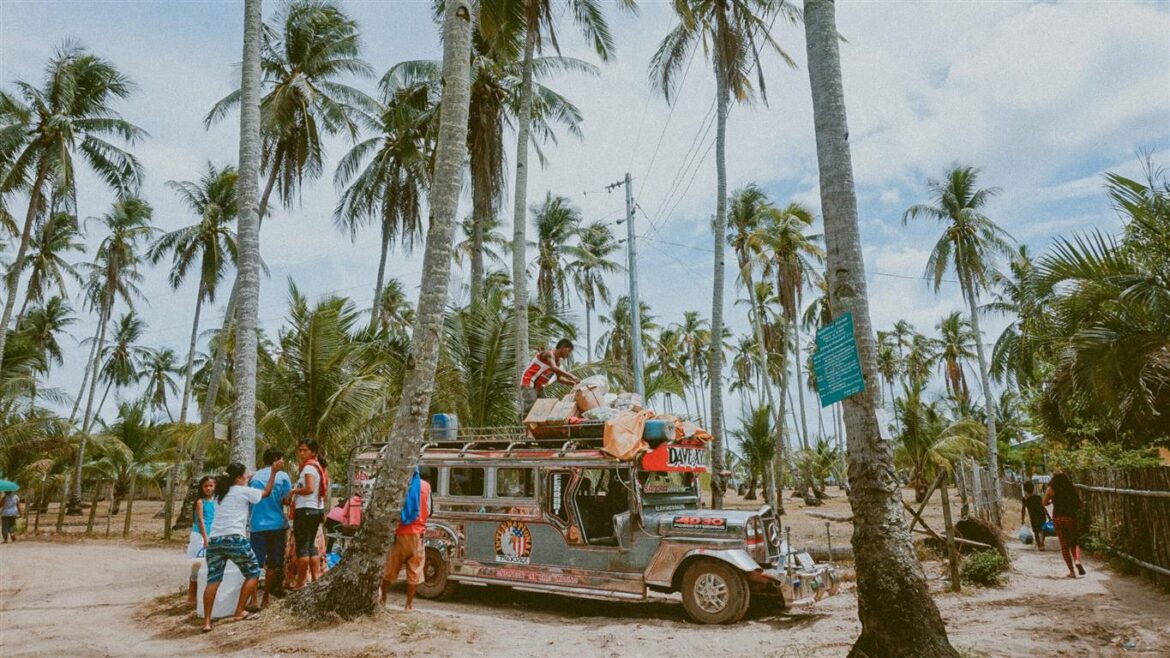
They come in all different colours and have incredible artwork on them – you won’t miss them. However, they tend to run on their own time, and will turn up when it wants to, not when it is meant to. That is simply part of the culture, nothing is done with any sort of speed.
The Philippine government have confirmed that Jeepney’s are being phased out due to their diesel engines and the fact that many of them are very run down. Not surprising given these are trucks that were used over 70 years ago. This is of course a great win for the environment, but a loss for travellers because it’s a great experience to ride one – do it before they’re gone!
Travel by Trike
For shorter overland trips, the tricycle or trike is the Philippine equivalent to the tuk-tuk and is one of the cheapest ways to get around when backpacking the Philippines. There are currently 4.5 million registered tricycles in the Philippines so it’s impossible to miss them, and they are the perfect travel solution for budget travellers.
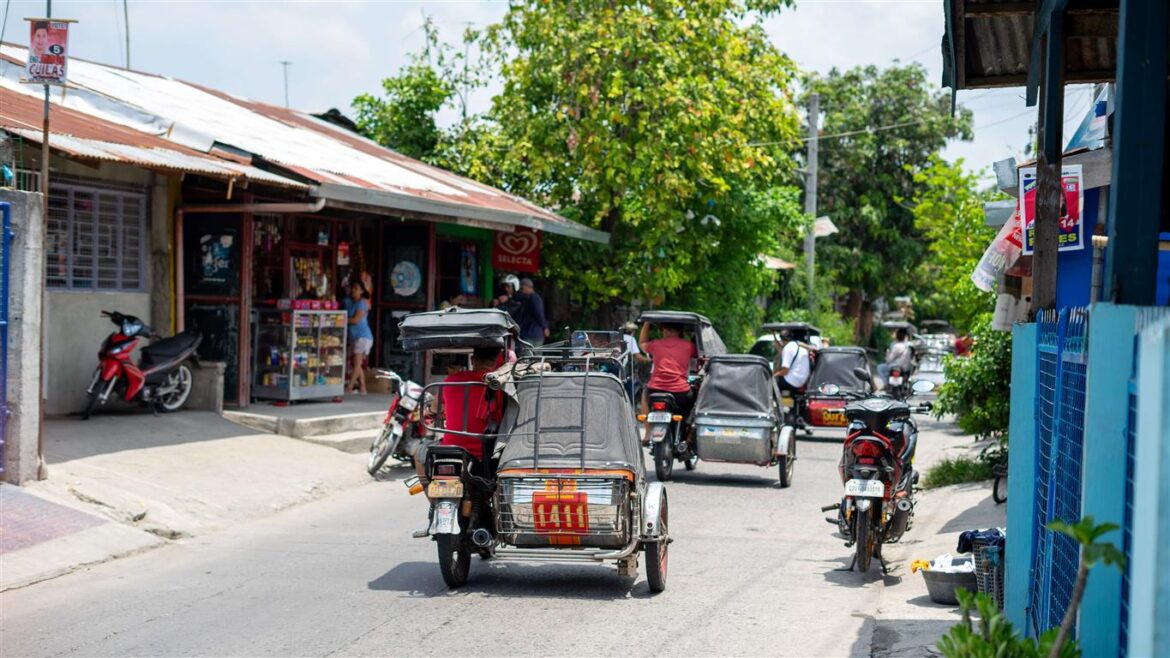
Don’t be deceived by their size, or the fact that they appear to be powered by a scooter with the engine size of a lawn mower. This little buys not only held Aaron and I, but also our 90L and 65L rucksacks too and picked up some speed getting us to our location. It’s a really fun way travel when backpacking the Philippines.
Travel by Taxi
Not the best option for those backpacking the Philippines on a budget, but often the quickest and easiest way of getting somewhere when you don’t have time to wait a couple of hours for a bus.
Nothing is very expensive in the Philippines, but private taxis are of course the most expensive method of travel and if you are travelling on a budget, not a method of transport you should use all the time.
Public Transport Generally
One of the main frustrations for those backpacking the Philippines can be the public transport system and it certainly does take some time to adjust to Philippine public transport.
Generally speaking, flights and ferries are timetabled albeit delays and last-minute departure-point changes are common.
However, with buses or jeepneys, things are much more fluid with timetables merely a vague guide as to timings (if a timetable is even available) and any stops along a route not marked by any meaningful signs making it hard to know when and where to catch a bus without local knowledge.
For some, the slower pace and the cultural experience of public transport in the Philippines (because who will ever forget sitting next to a man and 5 chickens at the back of a jeepney in Palawan; I certainly wont!) is part of the adventure. Equally, if you are considering spending a short period of time on various islands then the practicalities of car hire may not work for you.
However, for those backpacking the Philippines on a stricter timetable, or with more time to explore one island and with a desire to venture further off the beaten track, then car hire in the Philippines, or motorcycle hire of course, is a very viable option.
Hiring a Car
Often the first question when considering hiring a car is whether or not it is safe to do so. The good news is that car hire in the Philippines is perfectly safe, subject to our comments about which islands to potentially avoid. There are no significant warnings or dangers with driving between cities when backpacking the Philippines and the general consensus is that it is as safe to drive as a visitor/tourist as it is for a local.
That said, the practicalities of driving (for tourist and local alike!) do need to be considered as you will find the driving ‘style’ in the Philippines quite a contrast to many of our home countries. The main points to consider are the following:
- Traffic in major cities can be very bad and often for no particular reason other than the driving style of the other motorists. Of course, a crash or roadworks can hold up a journey as it can anywhere else in the world but in the Philippines you are equally likely to find traffic caused by errant animals, truck drivers attempting near-impossible cornering or reversing techniques, what appear to be long catch-ups between friends and families on opposite sides of the road without any regard to the lines of traffic waiting to pass or large vehicles stopping at will to deliver goods.
- Generally speaking, if you need to cross a city for any particular deadline (for example to make a connecting/onward journey) factor in a significant amount of contingency into that journey. Journeys outside of cities are generally fine and a lot less congested – although the risk of errant animals and questionable parking techniques still apply!
- The highway code can appear optional in the Philippines! Many drivers ignore stop signs and traffic lights (which itself can lead to traffic and congestion), will change lanes or take exits/turnings without any indication and faster vehicles will generally weave in and out of cars at will.
- Pedestrians and animals! As mentioned above, errant animals on the roads (even in major cities) is a risk but pedestrians pose an equally important risk. Even on heavily congested streets in a city centre, pedestrians will walk in the road seemingly oblivious to the vehicles around them. Whilst not worthy of note to locals, to those backpacking the Philippines it can be fairly concerning to try and avoid pedestrians as well as the other road users when travelling around.
All of that said, those of you who have hired cars and motorcycles in other countries around the world will recognise some or all of these cautionary notes and none of them are, in themselves, a reason to avoid car hire in the Philippines. It is simply a case of adjusting to a slightly more lax way of driving!
Top Tips:
- The Filipinos drive on the left-hand side of the road and most cars are left-hand drive.
- Most hire cars in the Philippines will have a manual gearbox so if you prefer automatic, book in advance and from a reputable/international company.
- Bring your driving licence with you!
- If you are going to hire a car for 90 days or less, you can do so with your home driving licence as long as that driving licence is in English. If it is not in English, you should have an official translation of the driver’s license in English obtained from your local embassy.
- If you wish to hire a car for more than 90 days, you need to obtain a local driver’s licence. You can ‘convert’ your home driving licence to a local licence or you can get a new licence from the Land Transportation Office.
Generally car hire starts from around $25 per day for a small/economy car and can increase to around $40 per day for a premium car.
As you would expect, the international car hire companies are located at the major airports and cities. For example, Hertz Philippines are located at the main international airports of Manilla and Cebu (amongst others) and also have city centre locations in Manilla, Cebu and Puerto Princesa. Click here for a full list of locations.
Unless you know the Philippines well and have a good working knowledge of cars (including how to fix them in a foreign country if things go wrong) then I would always recommend using a reputable car hire company for car rental in the Philippines. Not only will you ensure that the car is in good condition when you first collect it, but those companies usually offer fully comprehensive insurance and 24/7 roadside support and assistance as standard. Given the condition of some of the roads in the Philippines and some of the more remote locations around the islands, that support could be vital!
In addition to Hertz which I have mentioned above, the other well-known car rental companies operating in the Philippines include:
In addition to going directly to the care hire companies, I would also suggest checking out AutoEurope, a car hire comparison website, below to ensure you are getting the best price for the car you want.
[INSERT AUTOEUROPE WIDGET]
Motorcycle Rental in the Philippines – Mopeds
We found that the majority of hostels that we stayed in whilst backpacking the Philippines either made their own scooters for hire or had connections with near-by hire companies. We hired scooters in both Siquijor and Bohol and in both cases the reception staff of the hostels we stayed in organised it all for us.
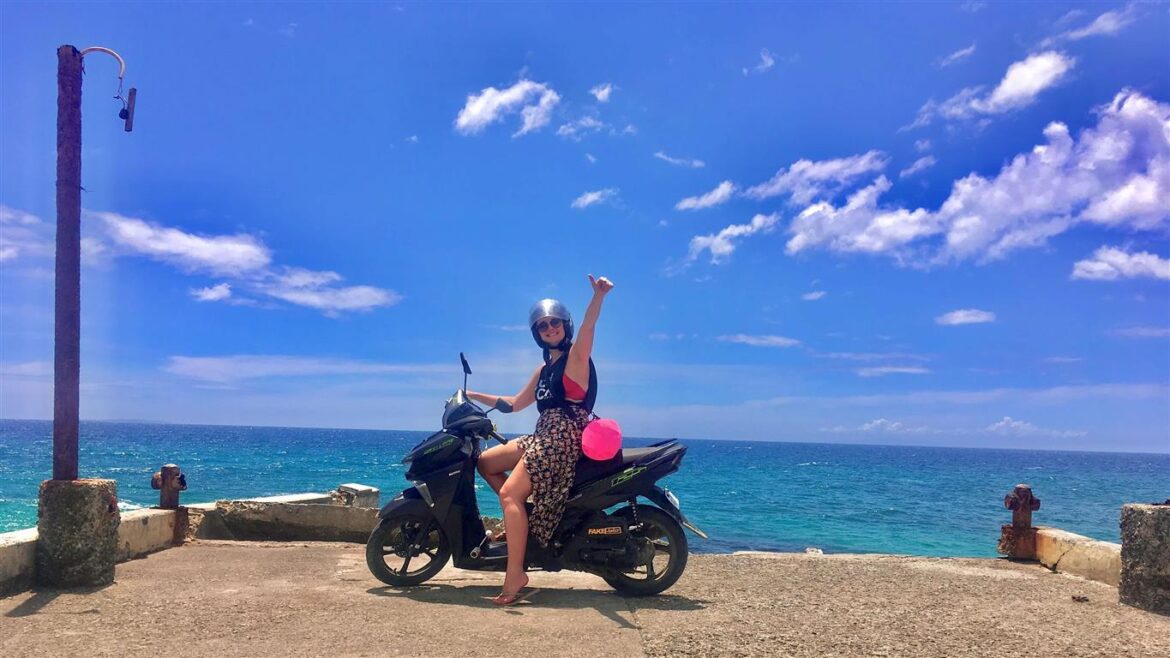
If you are looking to hire a scooter, then the formalities of hiring it will be much more straightforward than for car hire in the Philippines. Each place will have their own ‘rules’ but we generally found that they asked for a passport to be left behind both as evidence of identity as well as a means of a deposit to ensure you came back with the bike! If you are uncomfortable with the idea of leaving your passport, you could say that you cannot leave it with them as you need to leave it as a deposit with your hostel (which is true in many cases). A photocopy of the passport should suffice here; perhaps with a monetary deposit (or a charge on a credit card if the facilities allow) although we found most bike rental companies very relaxed.
Expect to pay between $5 to $10 per day for a scooter and please always ask for (and wear!) a helmet.
Motorcycle Rental in the Philippines – Larger Bikes
If you are looking to hire a larger motorcycle when backpacking the Philippines then you should ensure you have your full motorcycle licence with you, with a translation into English if your licence is not originally in English.
For motorcycle rental in the Philippines, the requirements are similar to car hire. If you are looking to hire a motorcycle for more than 90 days then you will need to convert your ‘home’ licence into a local licence or otherwise obtain a local licence from the Land Transportation Office.
Backpacking the Philippines: Planning your Trip
The area that the Philippines is spread over is vast and you will need to narrow it down. You should:
- Make a list of all the things you want to see and do. This can be based around what type of trip you want it to be. For example, if diving in the Philippines is your top priority, perhaps Palawan is your best bet. If you want to island hop, you will spend more time flying and travelling than you would if you were limiting your trip to just one or two islands, so this should be factored in.
- Divide the length of your trip by the number of islands/places you want to visit. How many days does that leave you with in each place? Is that enough days to do the things you want to do and allow for travel?
- Leave 2-3 days spare if disaster strikes (e.g. a boat is fully booked or you get stuck in traffic) to make sure this doesn’t affect your itinerary too much.
Staying Safe when Backpacking the Philippines
The number one consideration for staying safe on any trip abroad is to use common sense! I don’t want to sound patronising here but backpacking the Philippines is not regarded as dangerous (with backpacking Mindanao as an exception) and you will see that the locals are very generous, happy and kind people.
However, as with any other country in the world, there are steps that you should take to keep you safe and to ensure you only come back with good memories!
- Exploring and getting off the beaten track is great – but research where you’re going first if possible and it’s best not to do this at night.
- Much like you wouldn’t in certain parts of your home countries, keep your valuables stowed away – a money belt could be a good thing to pack.
- Be careful what you eat and drink. It is common for people to get sick in El Nido due to poor sanitation on the island. Avoid raw vegetables or anything that could have been washed in unfiltered water, avoid ice cubes and drink only filtered/bottled water.
- Keep your mouth shut in the shower – you don’t want a Charlotte York situation (Sex and the City reference for all those confused!)
- Check the government advice before you travel – your travel insurance may not cover you if you visit somewhere that is ‘blacklisted’. For example, the British government advise against travel to Mindanao (with the exception of the islands listed here).
Bear these in mind whilst you are backpacking the Philippines and you will have an unforgettable trip with memories to treasure for a lifetime!
Travel Insurance for Backpacking the Philippines
The single most important thing to arrange before backpacking the Philippines (or any other country for that matter!) is your travel insurance. It may not be as exciting as looking at flights, hostels and beaches but trust me, it is the most important thing you will buy for your trip.
Travel insurance is one of those things that you always hope you never need – you want to pay your premium and then hope you get home and think “did I really need that”? But trust me, you do! As long as you have the right cover, it will give you the peace of mind that should anything happen whilst you are away, you are covered.
Whether that is a delayed flight meaning you miss a connection, lost luggage, theft or damage to your precious electronics or the need for emergency or health treatment; if you have the right travel insurance you can focus on the issue at hand and not about the cost.
I have travel insurance for every trip and I feel fortunate to have only needed it twice, but on both occasions it was worth its weight in gold.
One time in Bali I had my bag snatched as I was walking down the street and it had my digital camera in it (old school I know!). Fortunately, I had recently backed it up so I didn’t lose many photos but the camera was gone. A quick trip to the police station to get a crime number and an email to my insurance company with proof of purchase saw the full purchase price of the camera arrive into my bank account within days.
The second time, a friend I was with fell and twisted her ankle whilst skiing in the Alps and was unable to put any weight on it. After I ran (dragged…!) myself up the piste to the nearest medical cabin, she was taken off to hospital via ski-mobile and ambulance. The total cost of her treatment, including the evacuation and subsequent treatment was around €3,000. A quick call to the insurance company meant the hospital invoiced the insurance company directly and the bill was sorted.
You always hope you never need it, but it is so important to have it should disaster strike. Something like the above could ruin your day, but not having the right travel insurance could potentially mean the difference between a bad day/week and the end of your trip.
So as soon as those flights are booked, get your travel insurance sorted, tick it off the to-do list and get back to the fun of planning your trip!
A final few words from me!
The Philippines is a huge, beautiful country and whilst this guide is extensive, there are so many places we haven’t covered. I really hope that this guide helps you plan an epic trip to the Philippines.
Have you been to the relatively tourist-free Mindanao? Discovered a hidden gem? Ate something delicious?! I would love to hear from you in the comments, on social media (see follow buttons below!) or on email about your own experiences when backpacking the Philippines so drop me a line!
In the meantime, happy travels!
Disclaimer: My blog contains affiliate links. If you buy something through these, I get a small commission at no additional cost to you. Thank you x